Introduction to Git

As long as you work on computers, you’re likely running into a situation where you need to constantly modify a file or a folder. Problem is that when you want to check what it was like 3 days ago or you want to undo your modification, things will get tricky. That’s when version control comes to our aid.
Git is a very popular distributed version control software. Note the word “distributed”, meaning that it will not only work locally on your computer but also can be used remotely. Since Git is a command-line based tool, you need to learn the syntax to make the best use of it.
Before we dive into the commands, let’s take a look at the bigger picture.
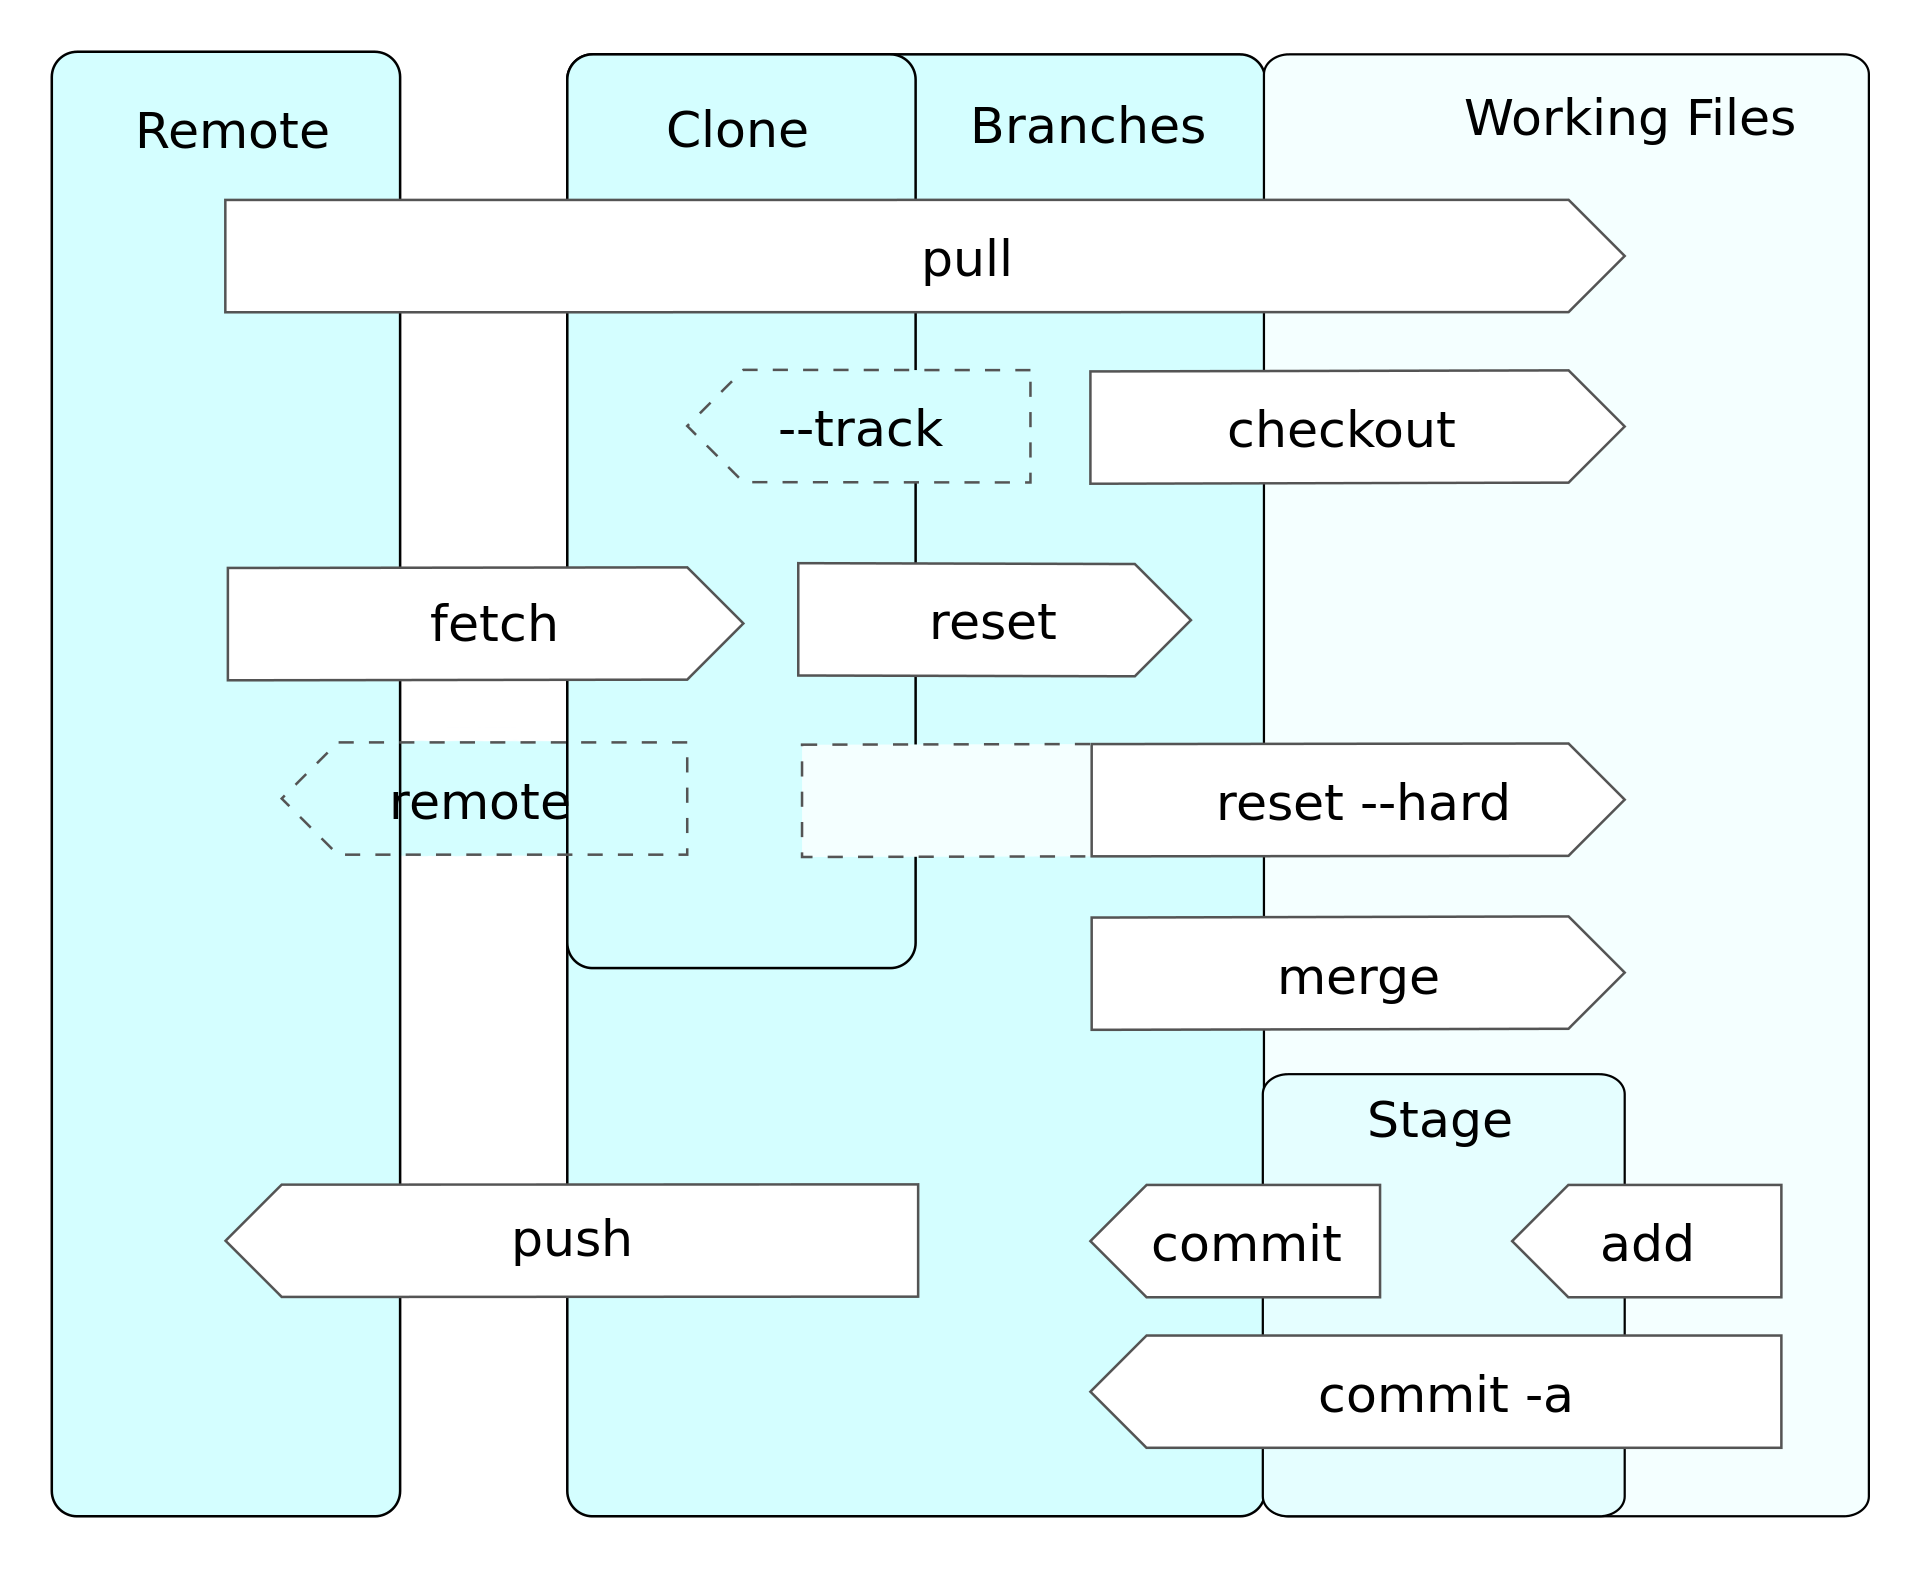
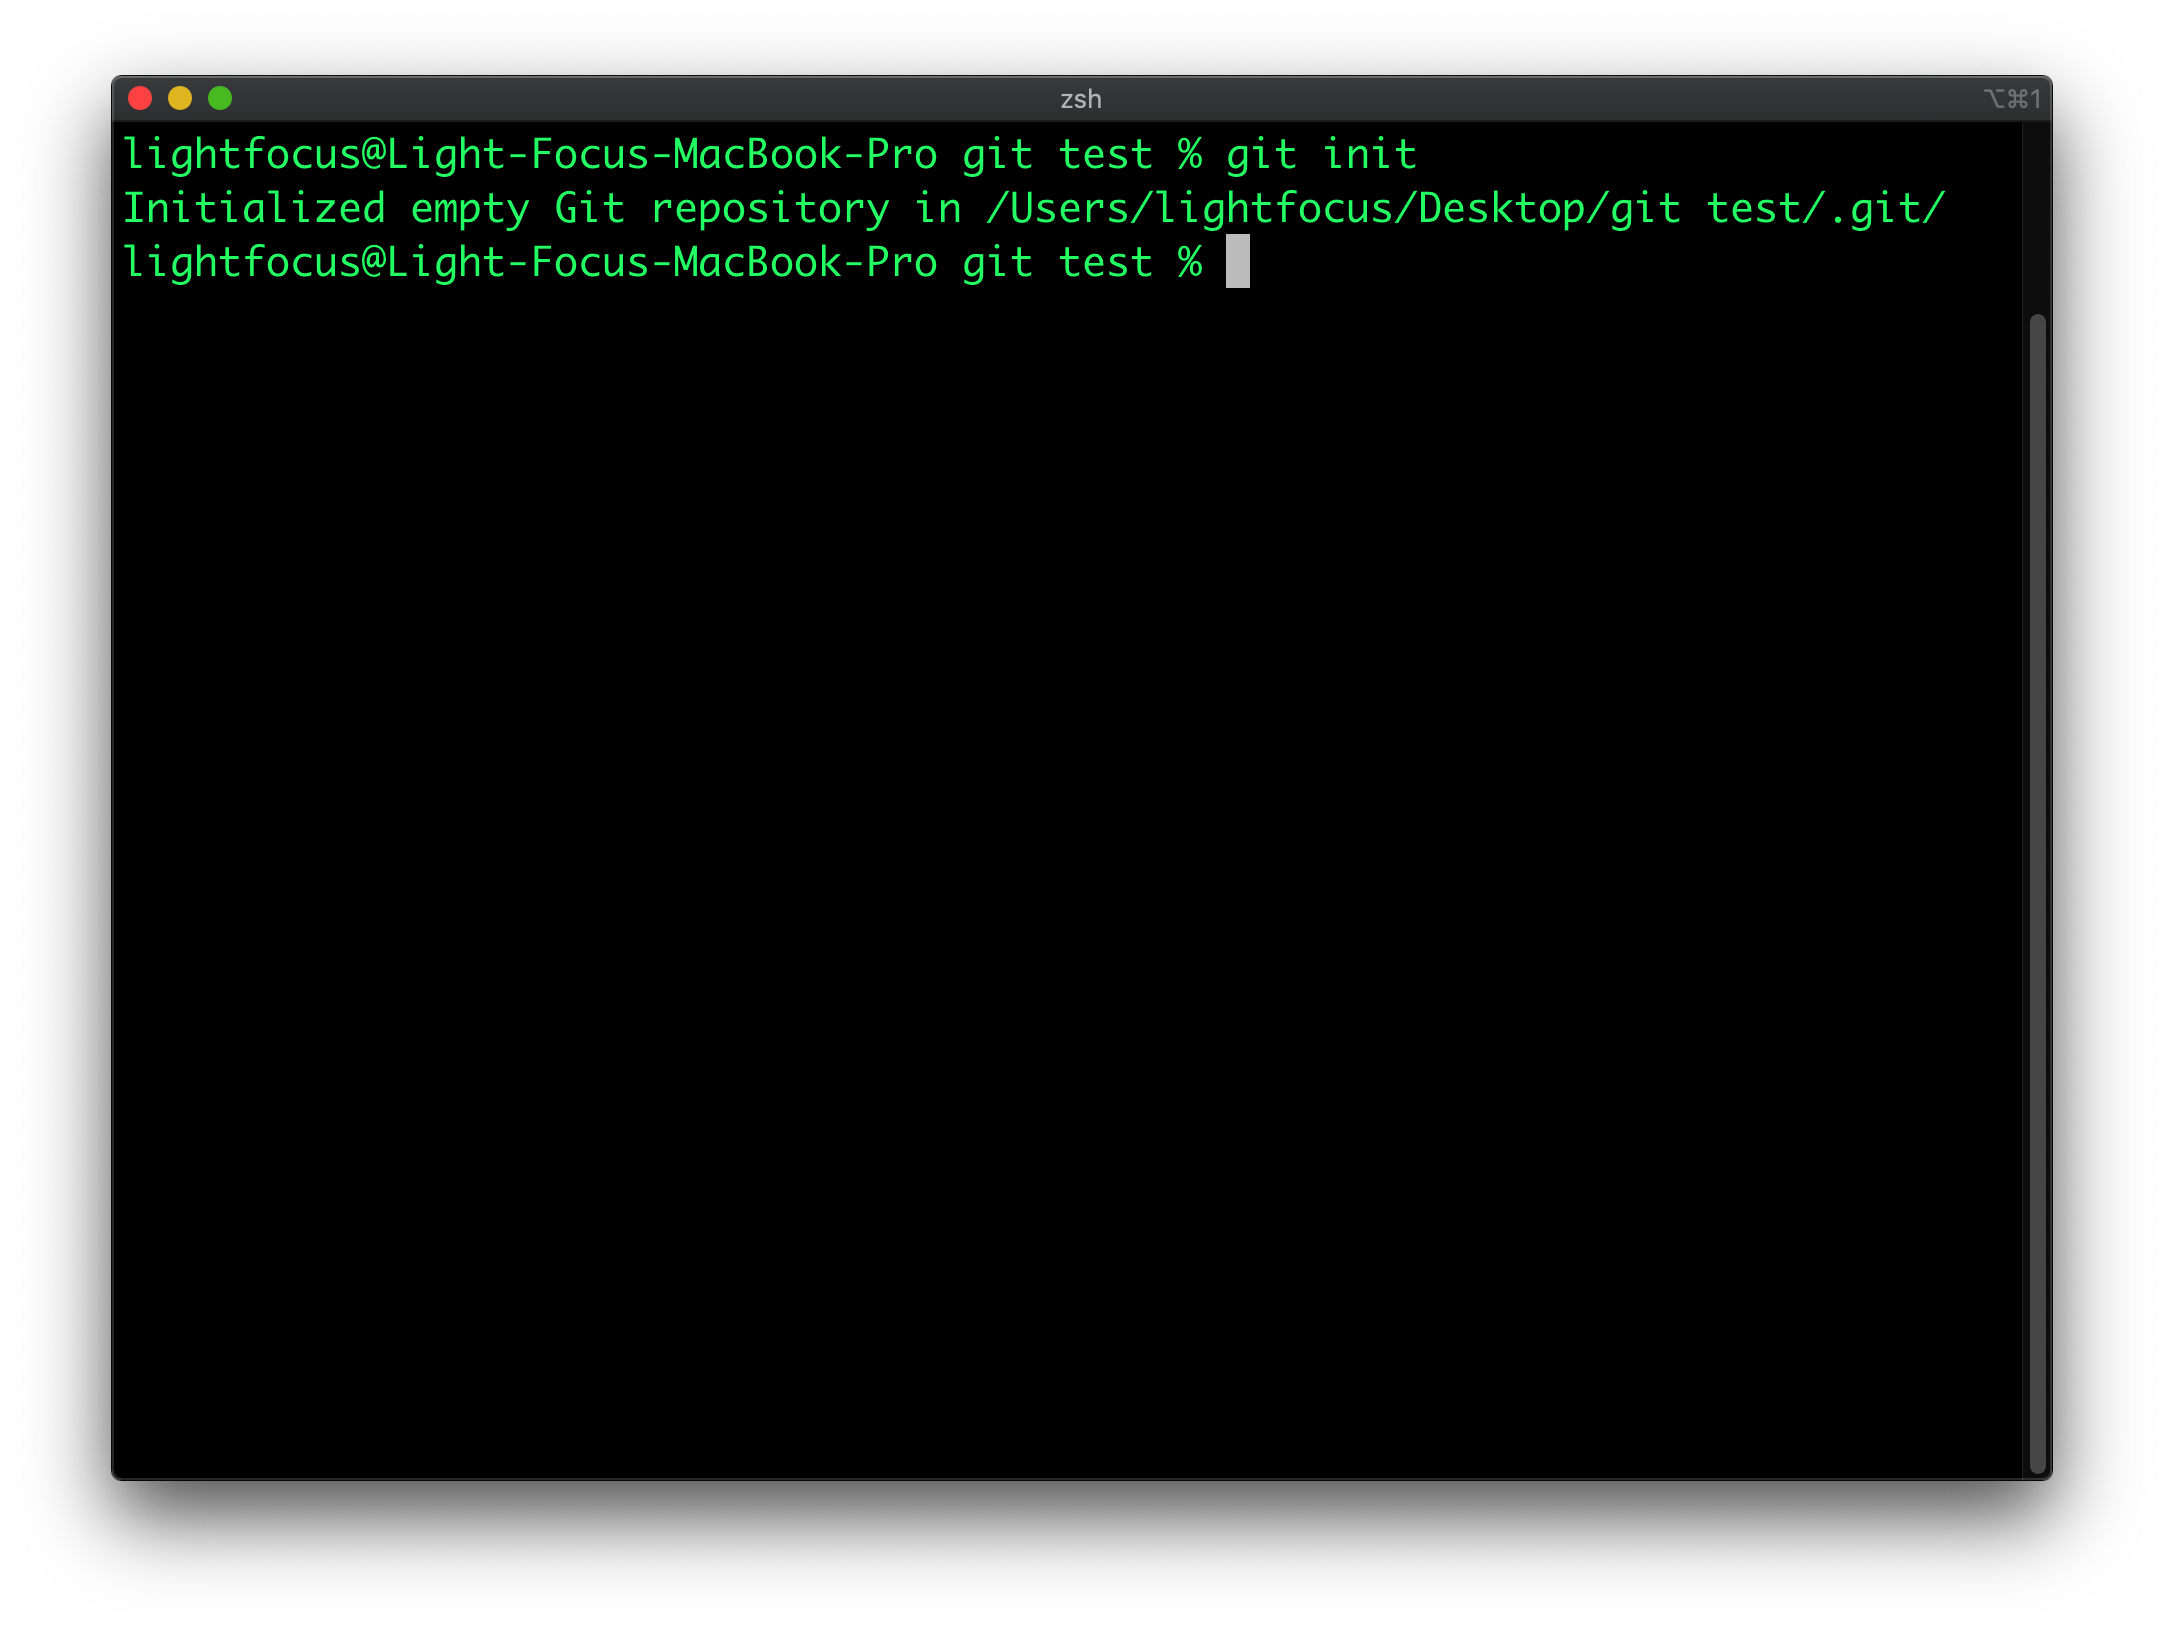
If we want to use Git in our project, go into the working folder and type in the command “git init” to initialize git so it knows the scope of which files need to be tracked.
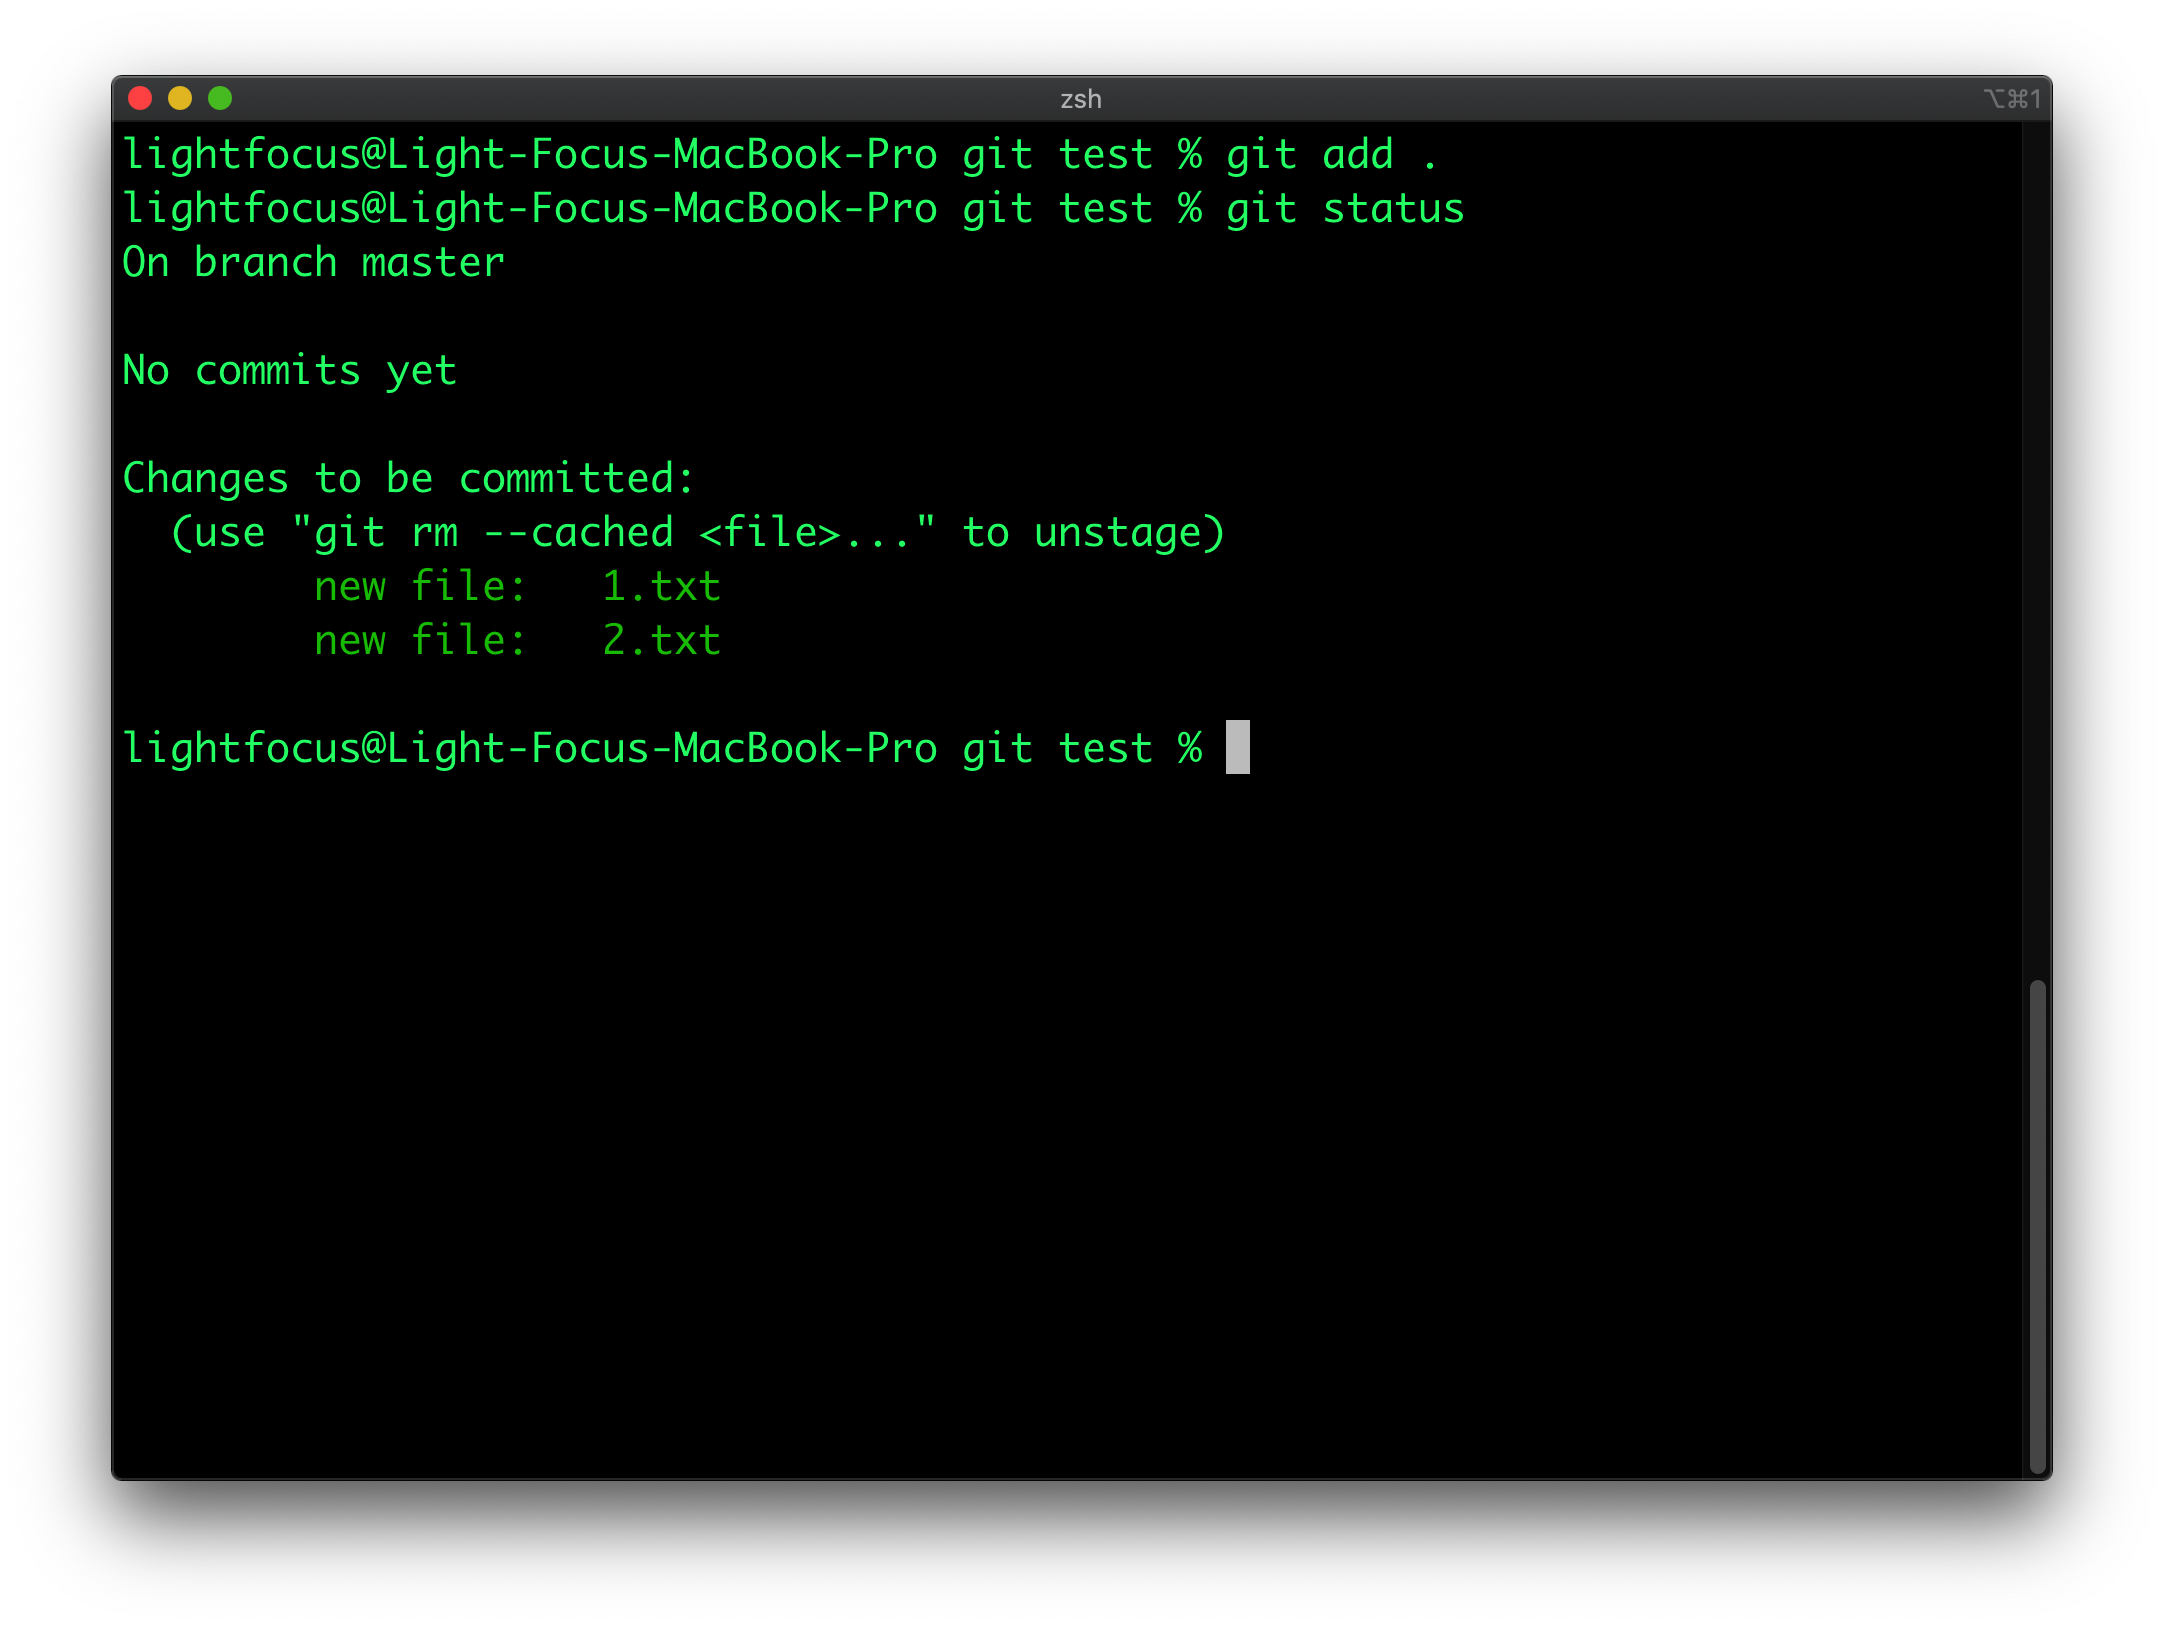
After initialization, we can use the command “git status” to verify the current status of git, which in this case, you can see all files haven’t been added to git. Whenever you want to check the status, you can use this command.

To add these files to git, we will use the command “git add .” where the dot means all files. This will add all files within the scope of git to the “stage” where you can later decide whether you want to add them into the branch. Alternatively, you can use “git add <filename>” to add the specific file you want to add.
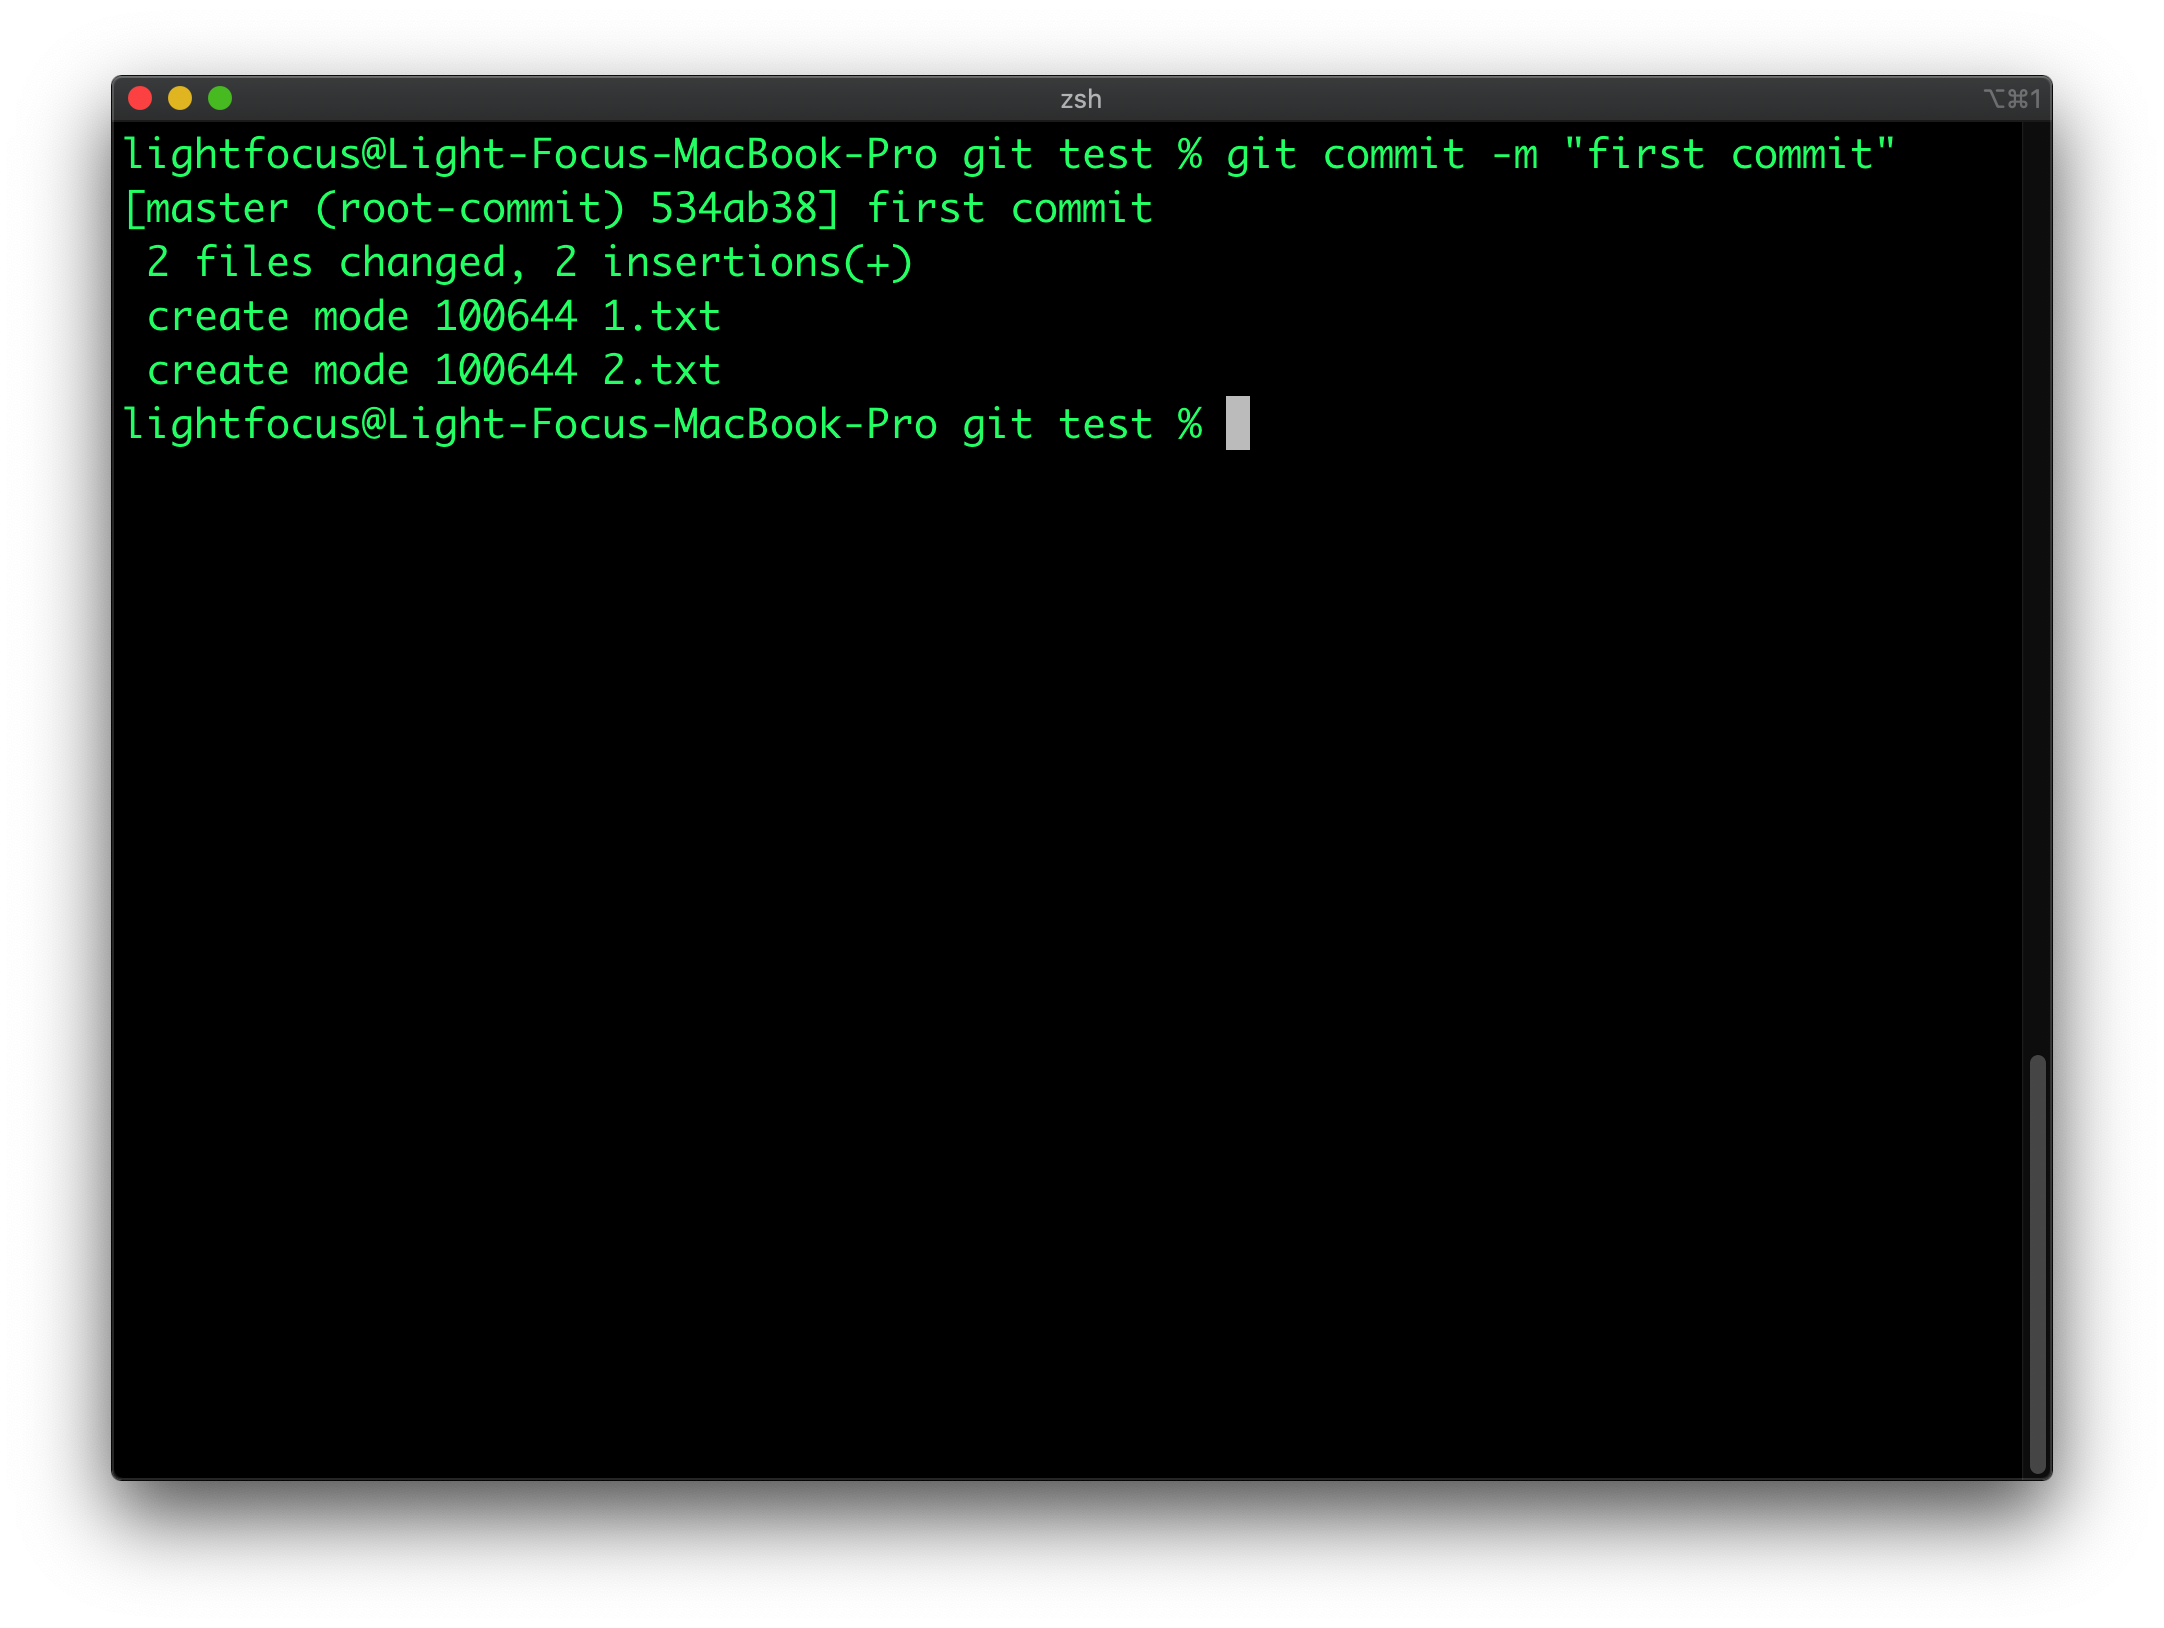
Once we confirm all files in the stage need to be committed to the branch, we type in “git commit -m your commit”.
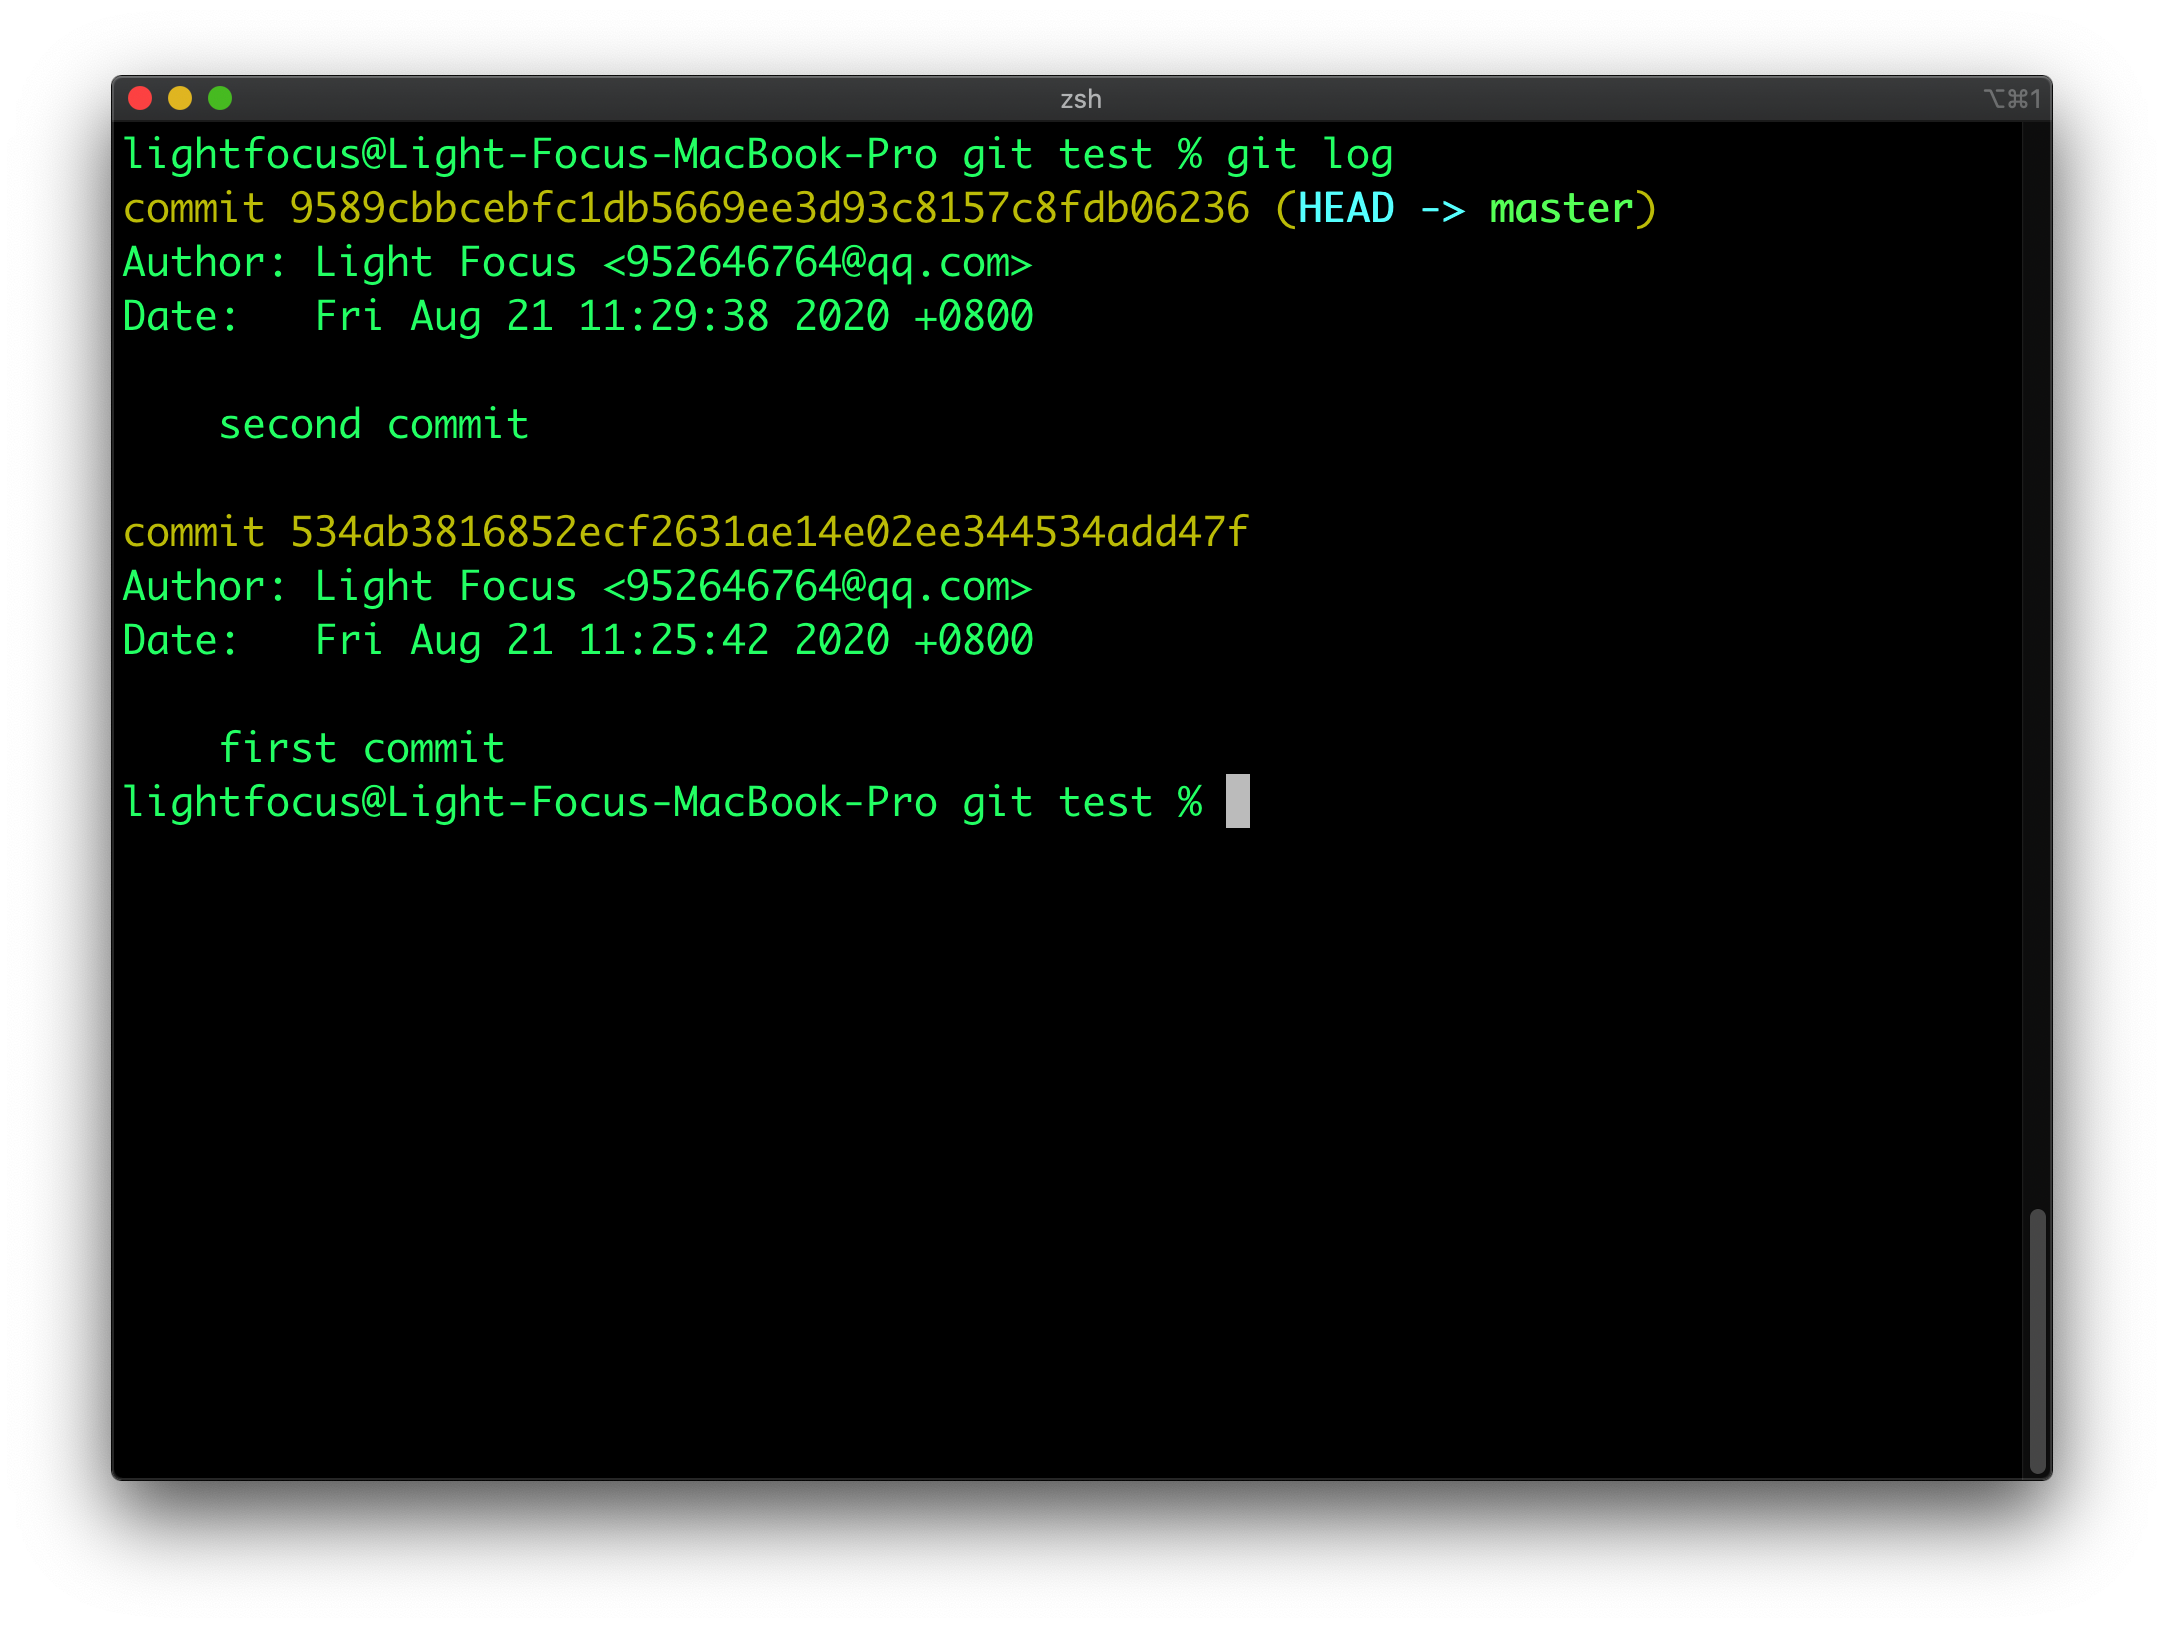
 If we use the command “git log”, we can see all the commits we’ve done so far.
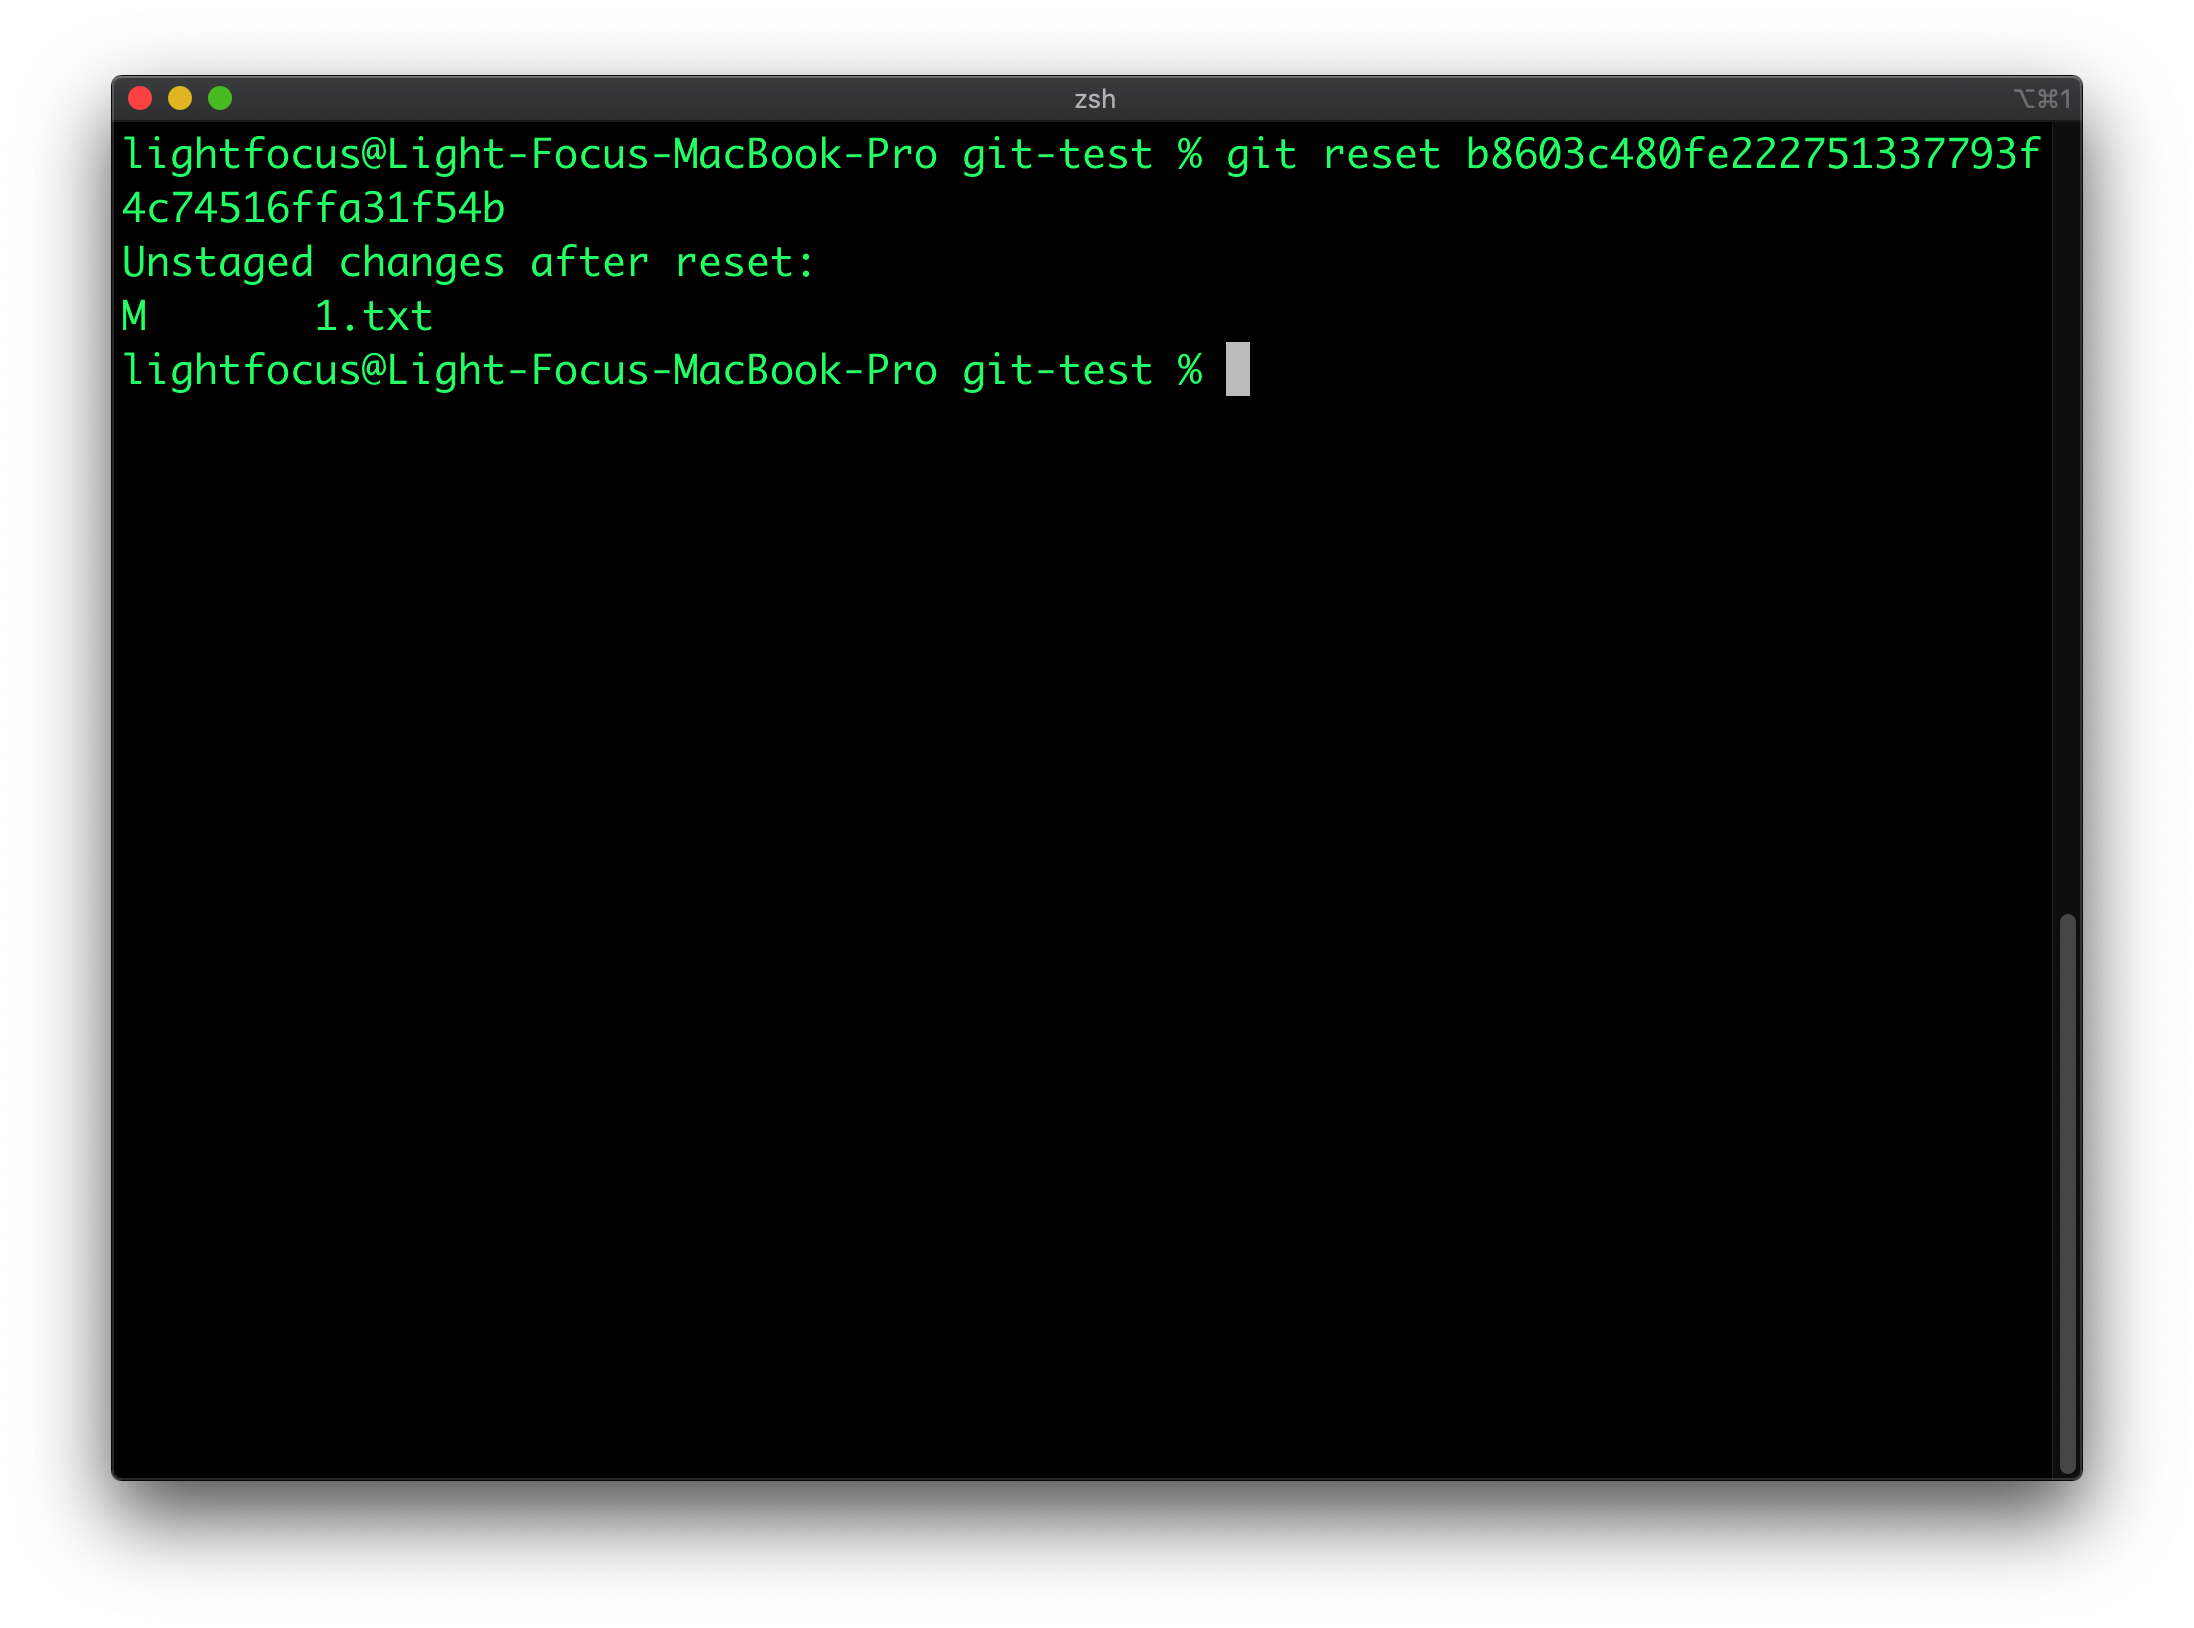
Since Git tracks all the commits, you can easily revert to the previous commit if you wish. Notice every commit has a long special number, we can use that number to clarify which commit we want to revert to. Type in “git reset <commit number>” and off you go.
Another important feature of version control is to be able to work on different branches. If I have an idea but I’m not sure if it will be in the final project, I can use branches to experiment with my idea without affecting the master branch.
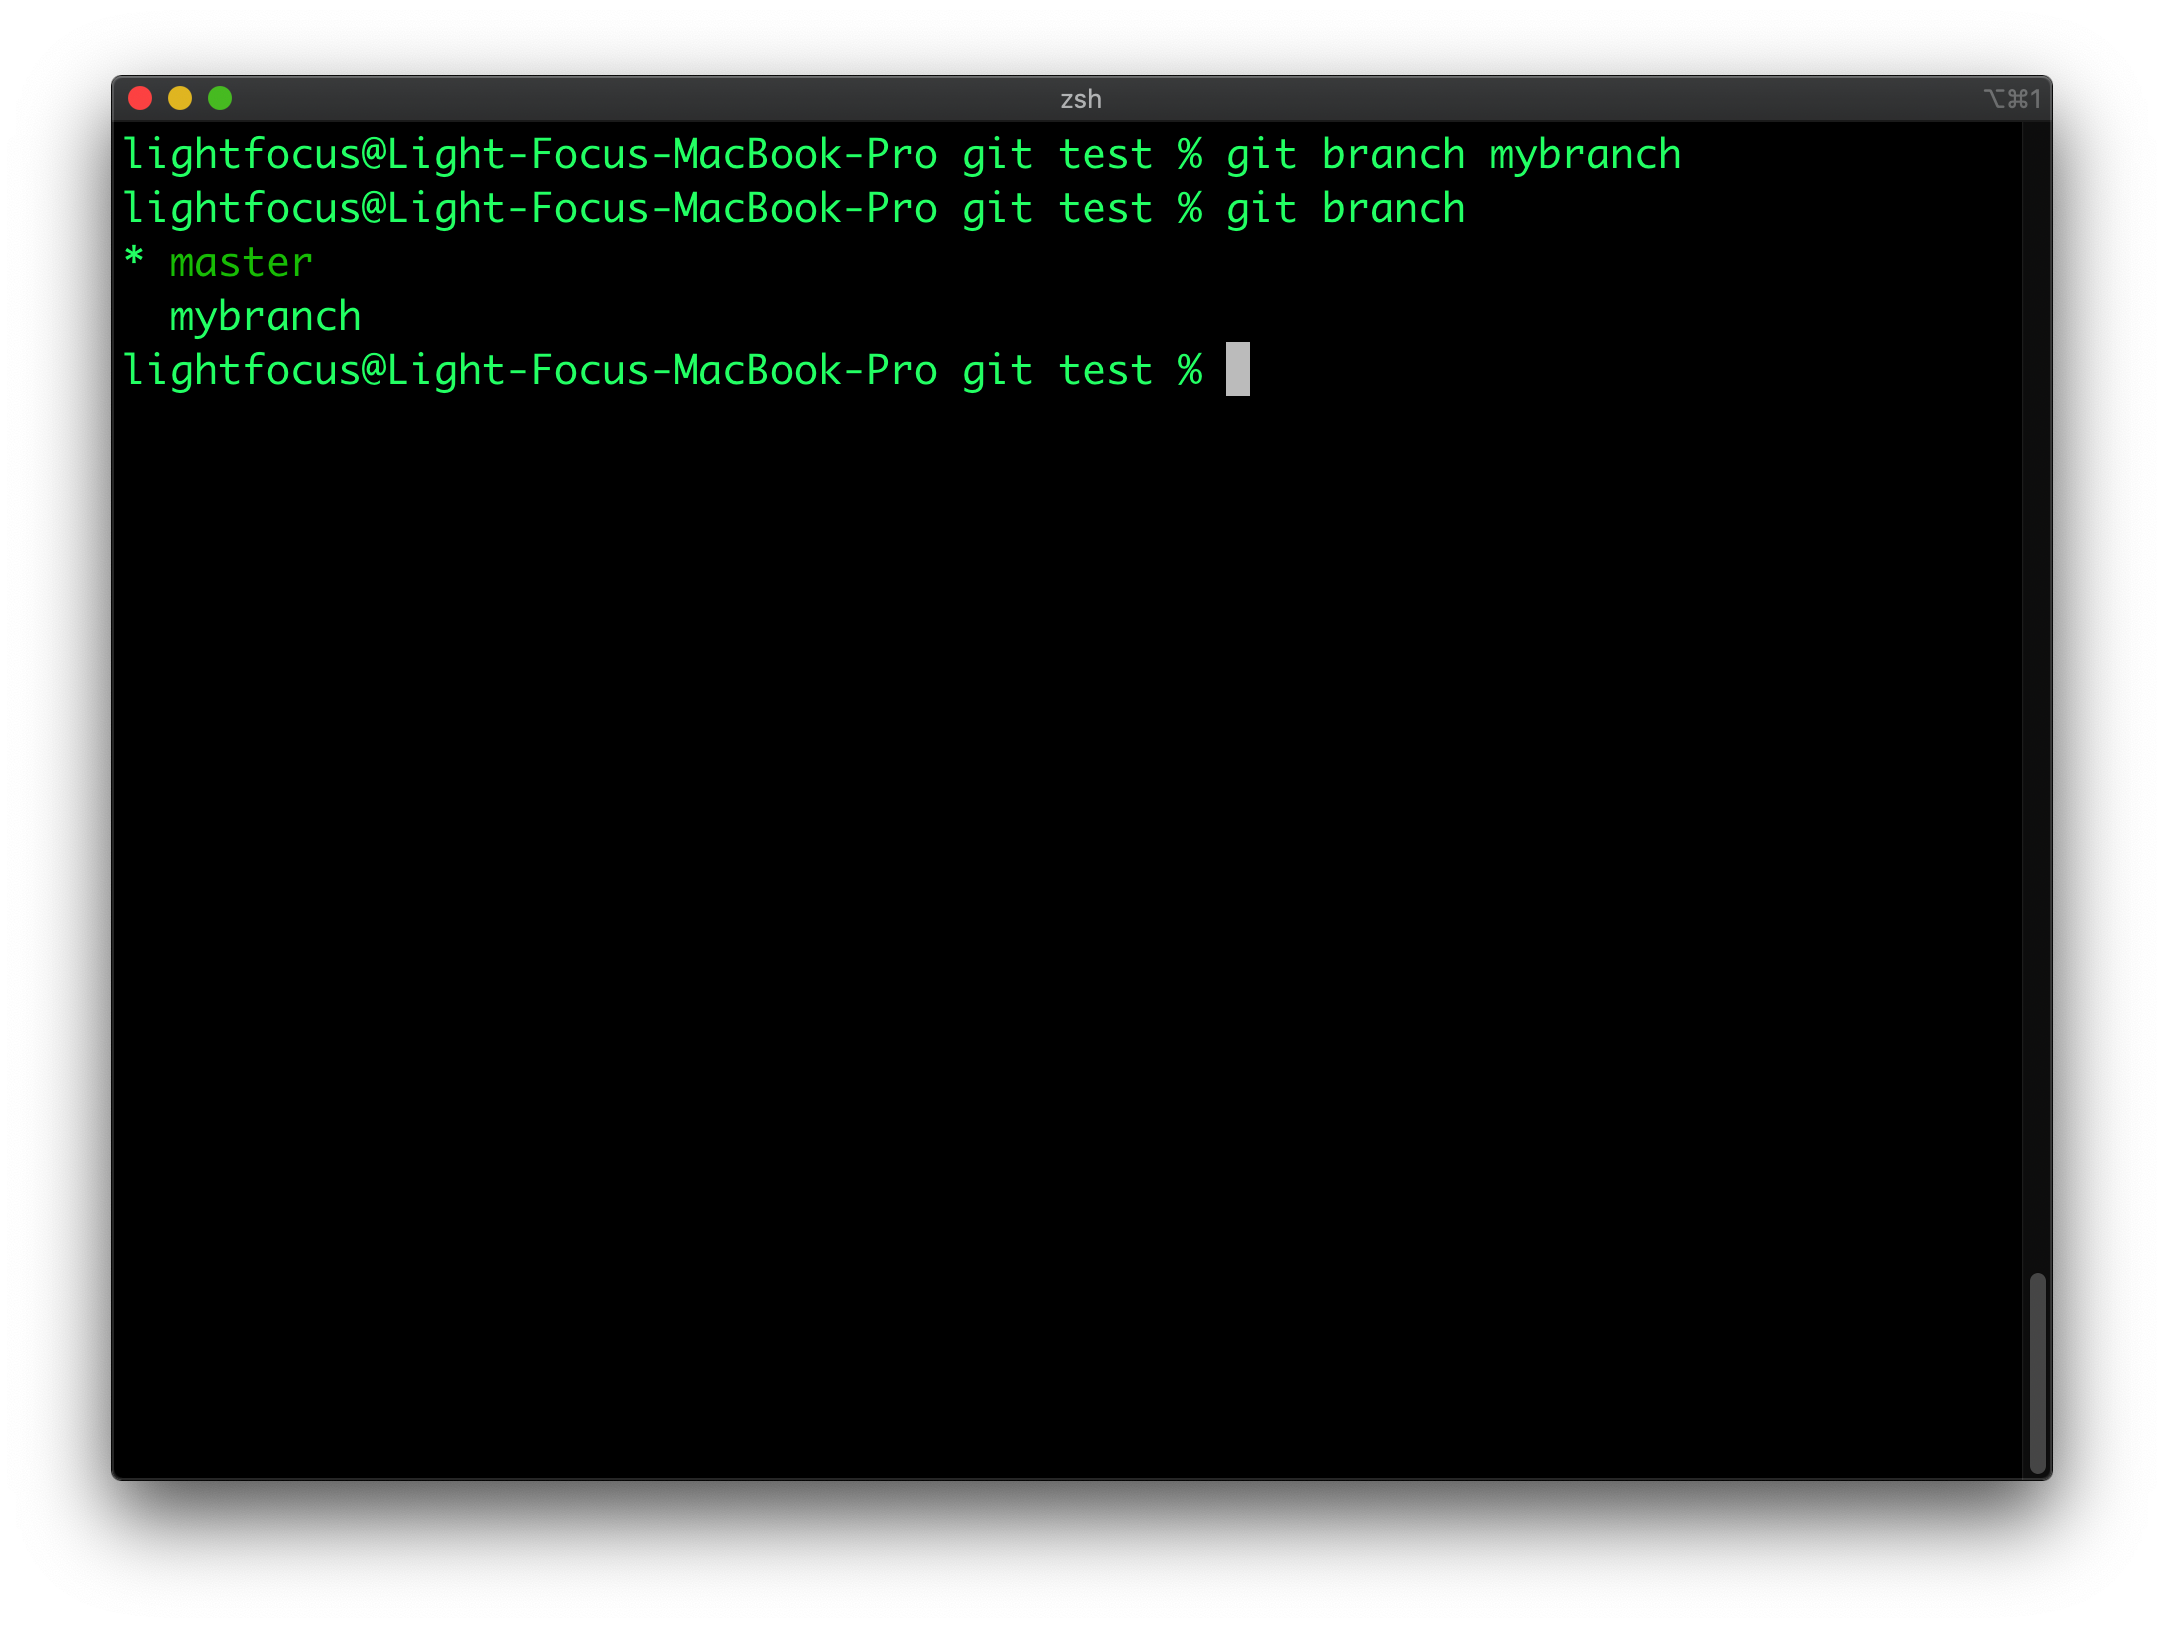
By default, you’re working on the master branch. You can make new branches by typing “git branch <branchname>”. If you’re not sure which branch you’re working on, you can use the command “git branch” to check it out, the branch you’re on indicates by an asterisk.
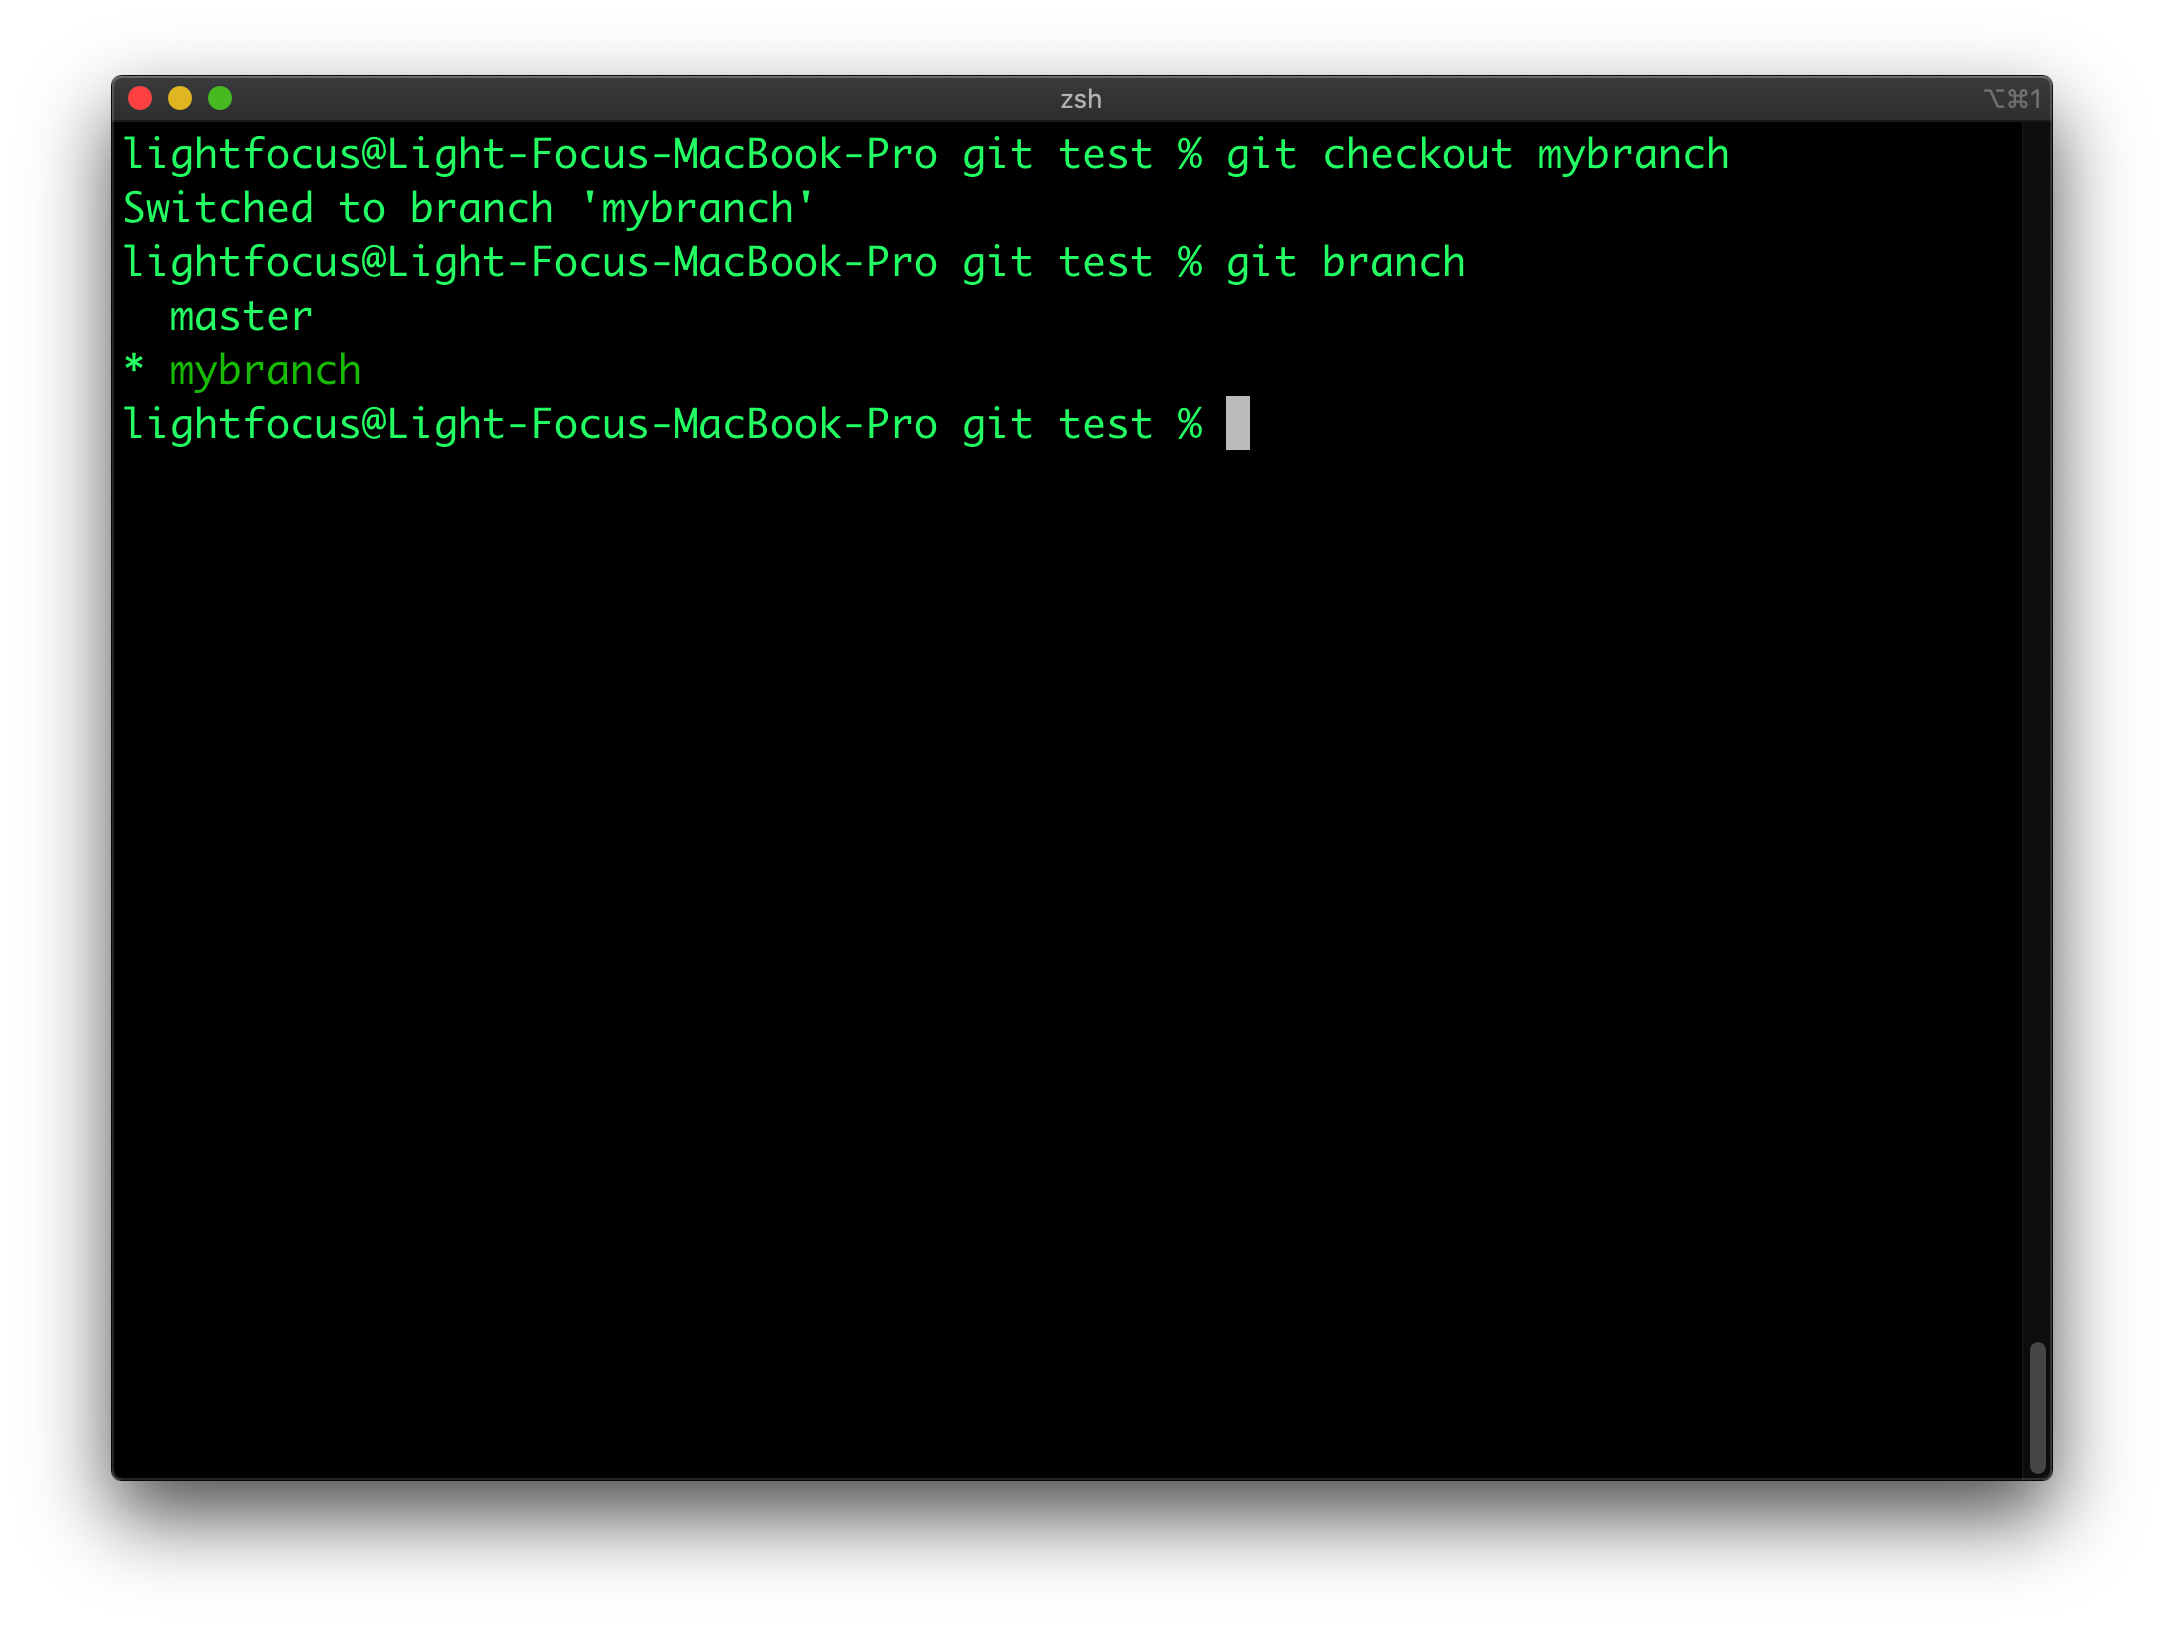
To move between branches, type in “git checkout <branchname>”.
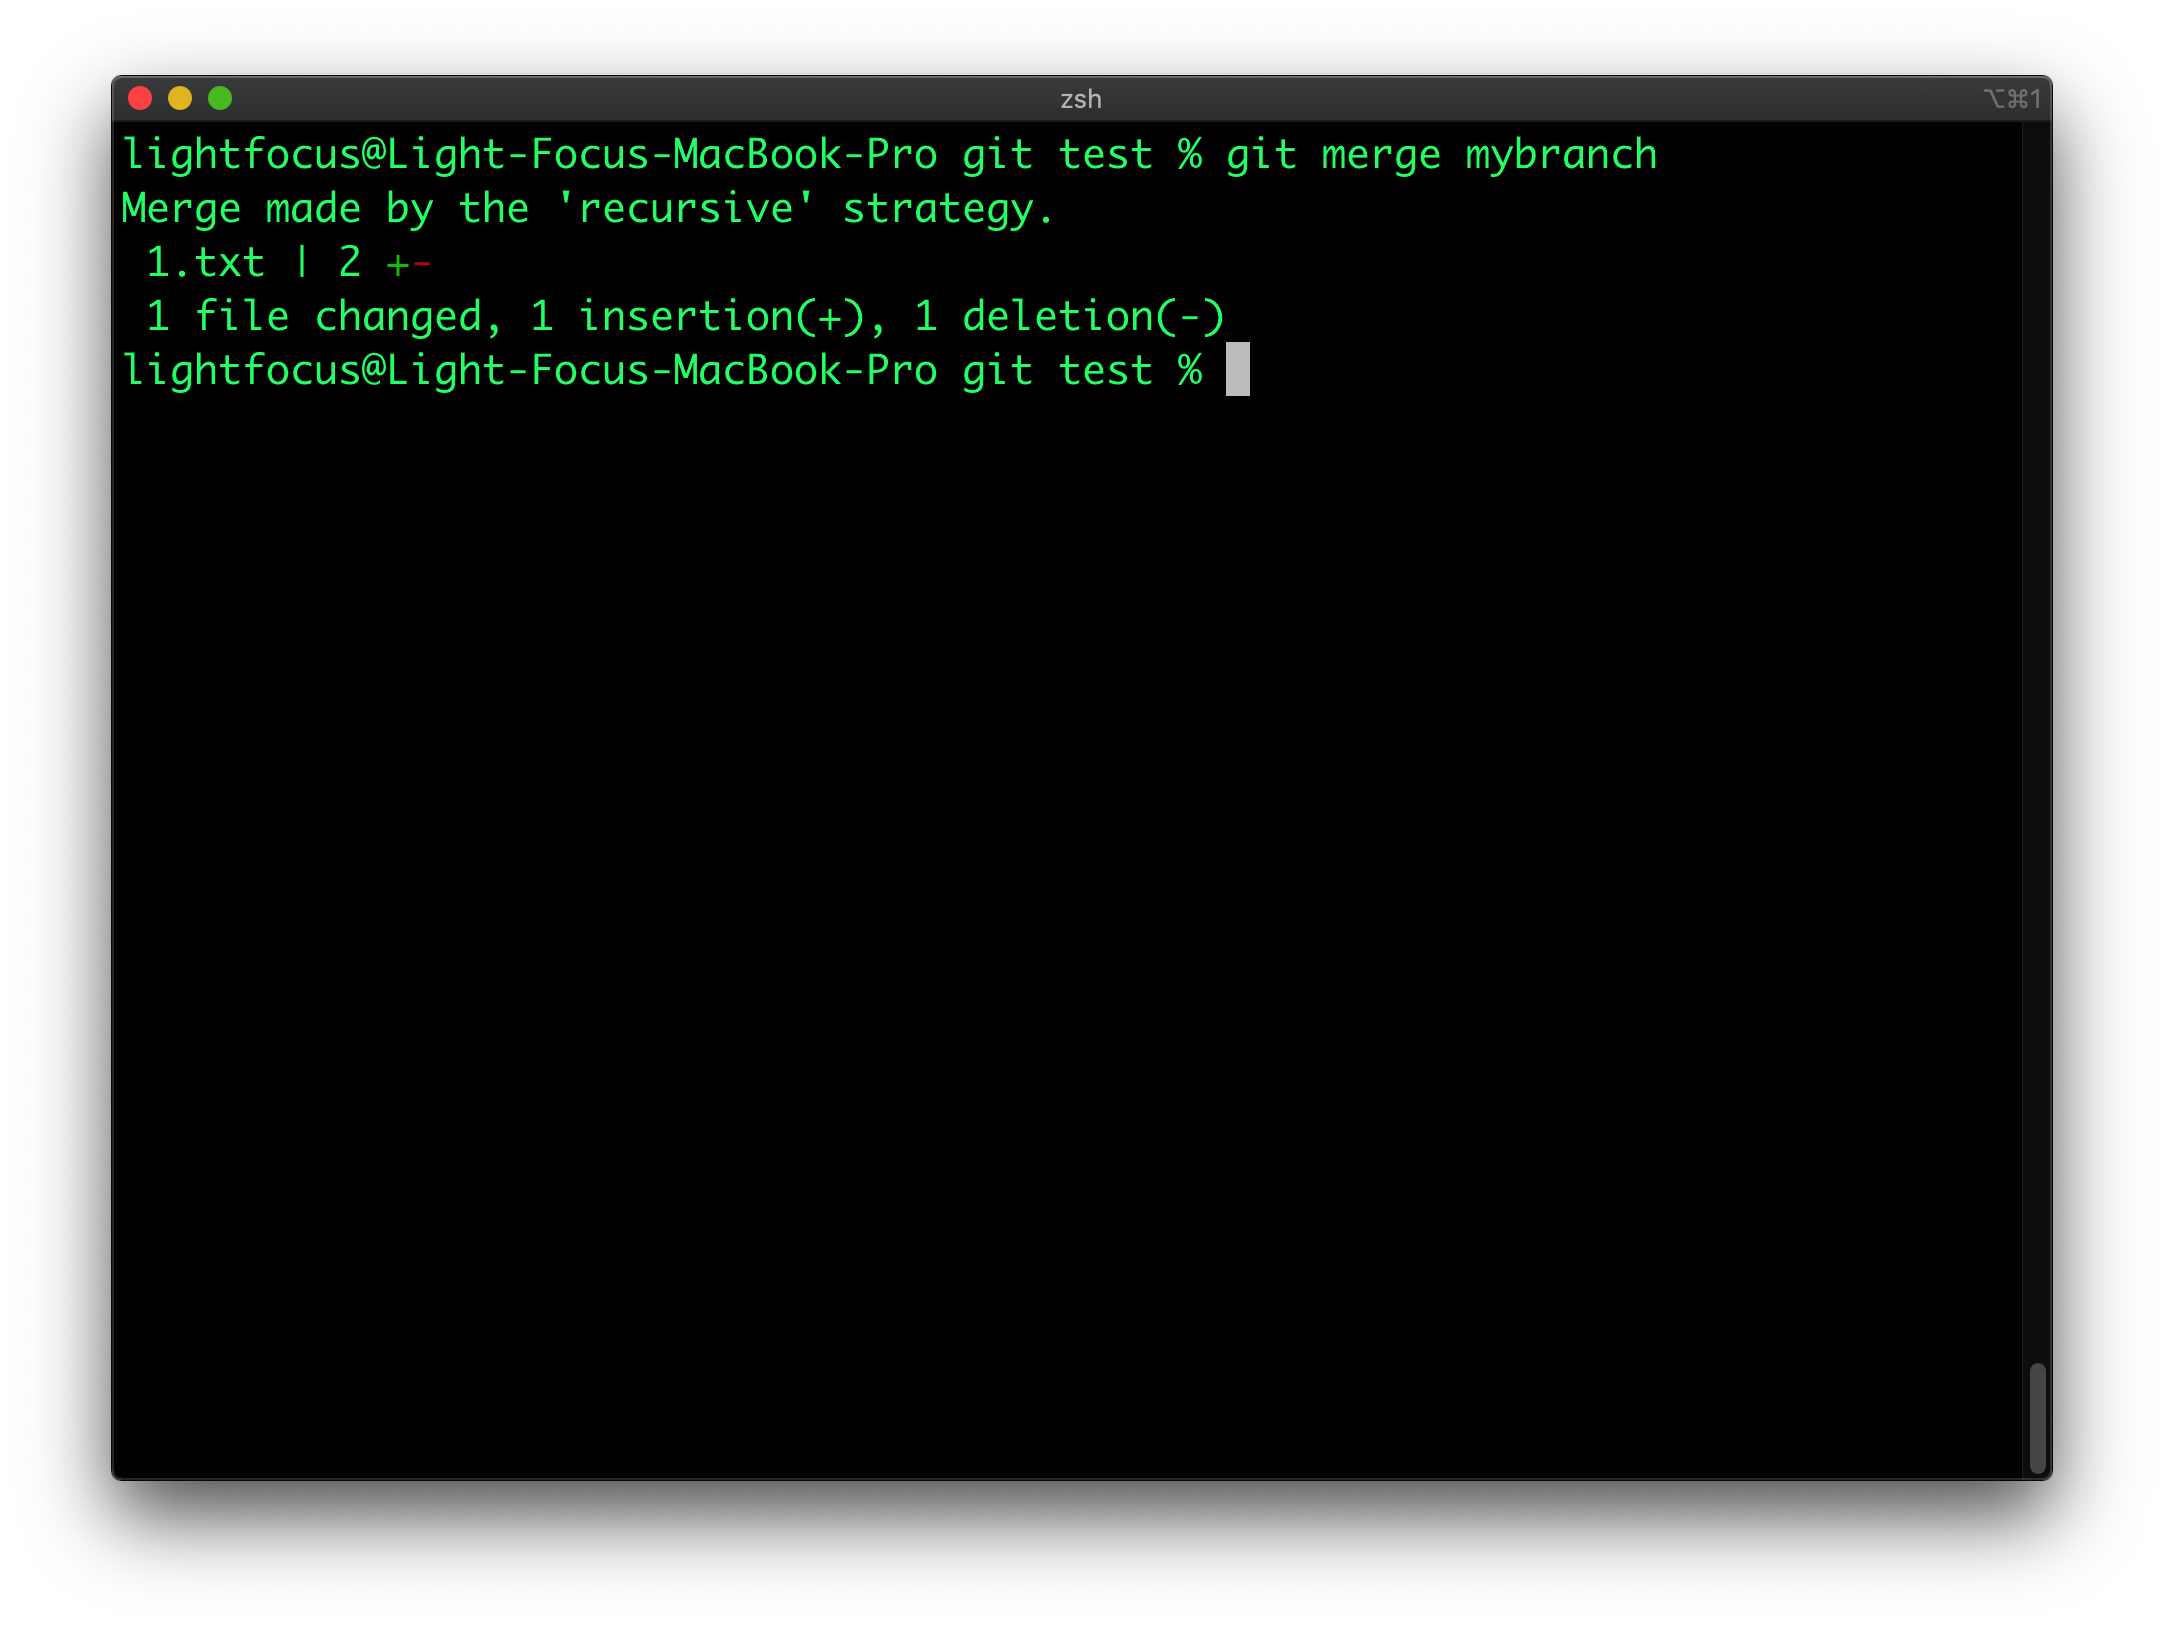
When you’re satisfied with your branch and want to merge it with the current branch, you can use the command “git merge <branchname>”.
Now you know what to do when you add or modify files, more importantly when you want to undo the changes or make a branch. That wraps up the basics of git on your local computer. But remember we talked about “distributed”, so let’s talk about the remote capability of git next.
To simplify this post, we only talk about the most common commands you need to use.
When you want to publish your git project online, you first need to specify where you want to put by using the command “git remote add <name> <url>” where we used to name it “origin”, but choose your name anyway.
After that, we need to push our git project to the Internet. Type in “git push <remote> <branch>” where <remote> is the name you give and <branch> specifies the branch you want to push, usually master.
Similarly, if we want to update our local project from the online repositories, we can use “git pull <remote>”. This will automatically merge the online files with your local files.
But there is one more thing. What if we want to get a copy of other people’s git project? We can simply use “git clone <repo>” where <repo> is usually a URL of the repository ends with “.git”.
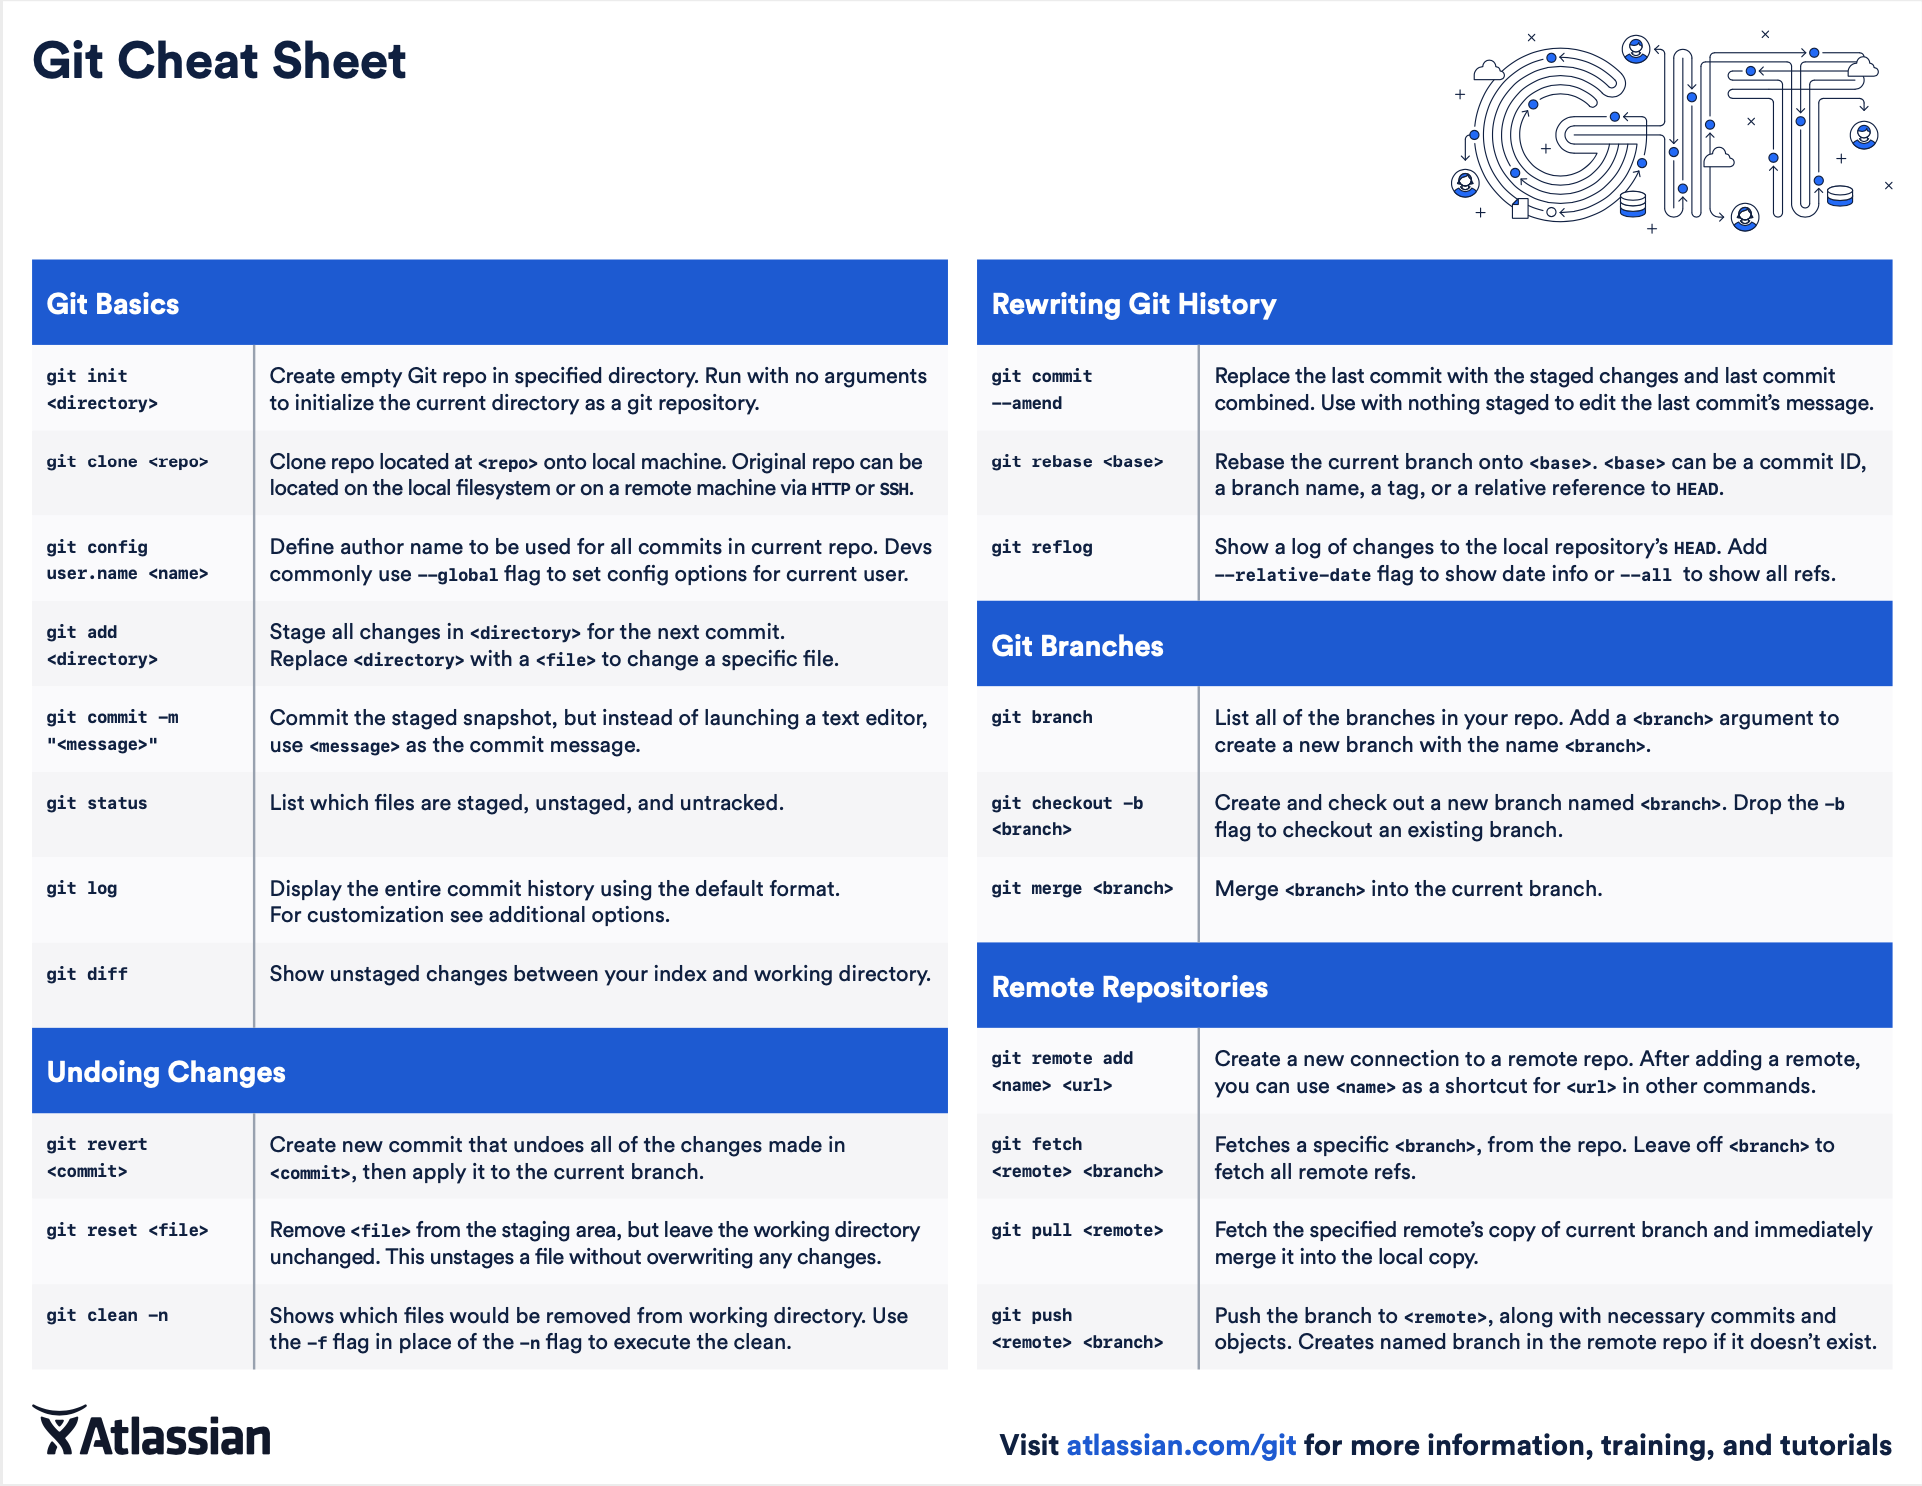
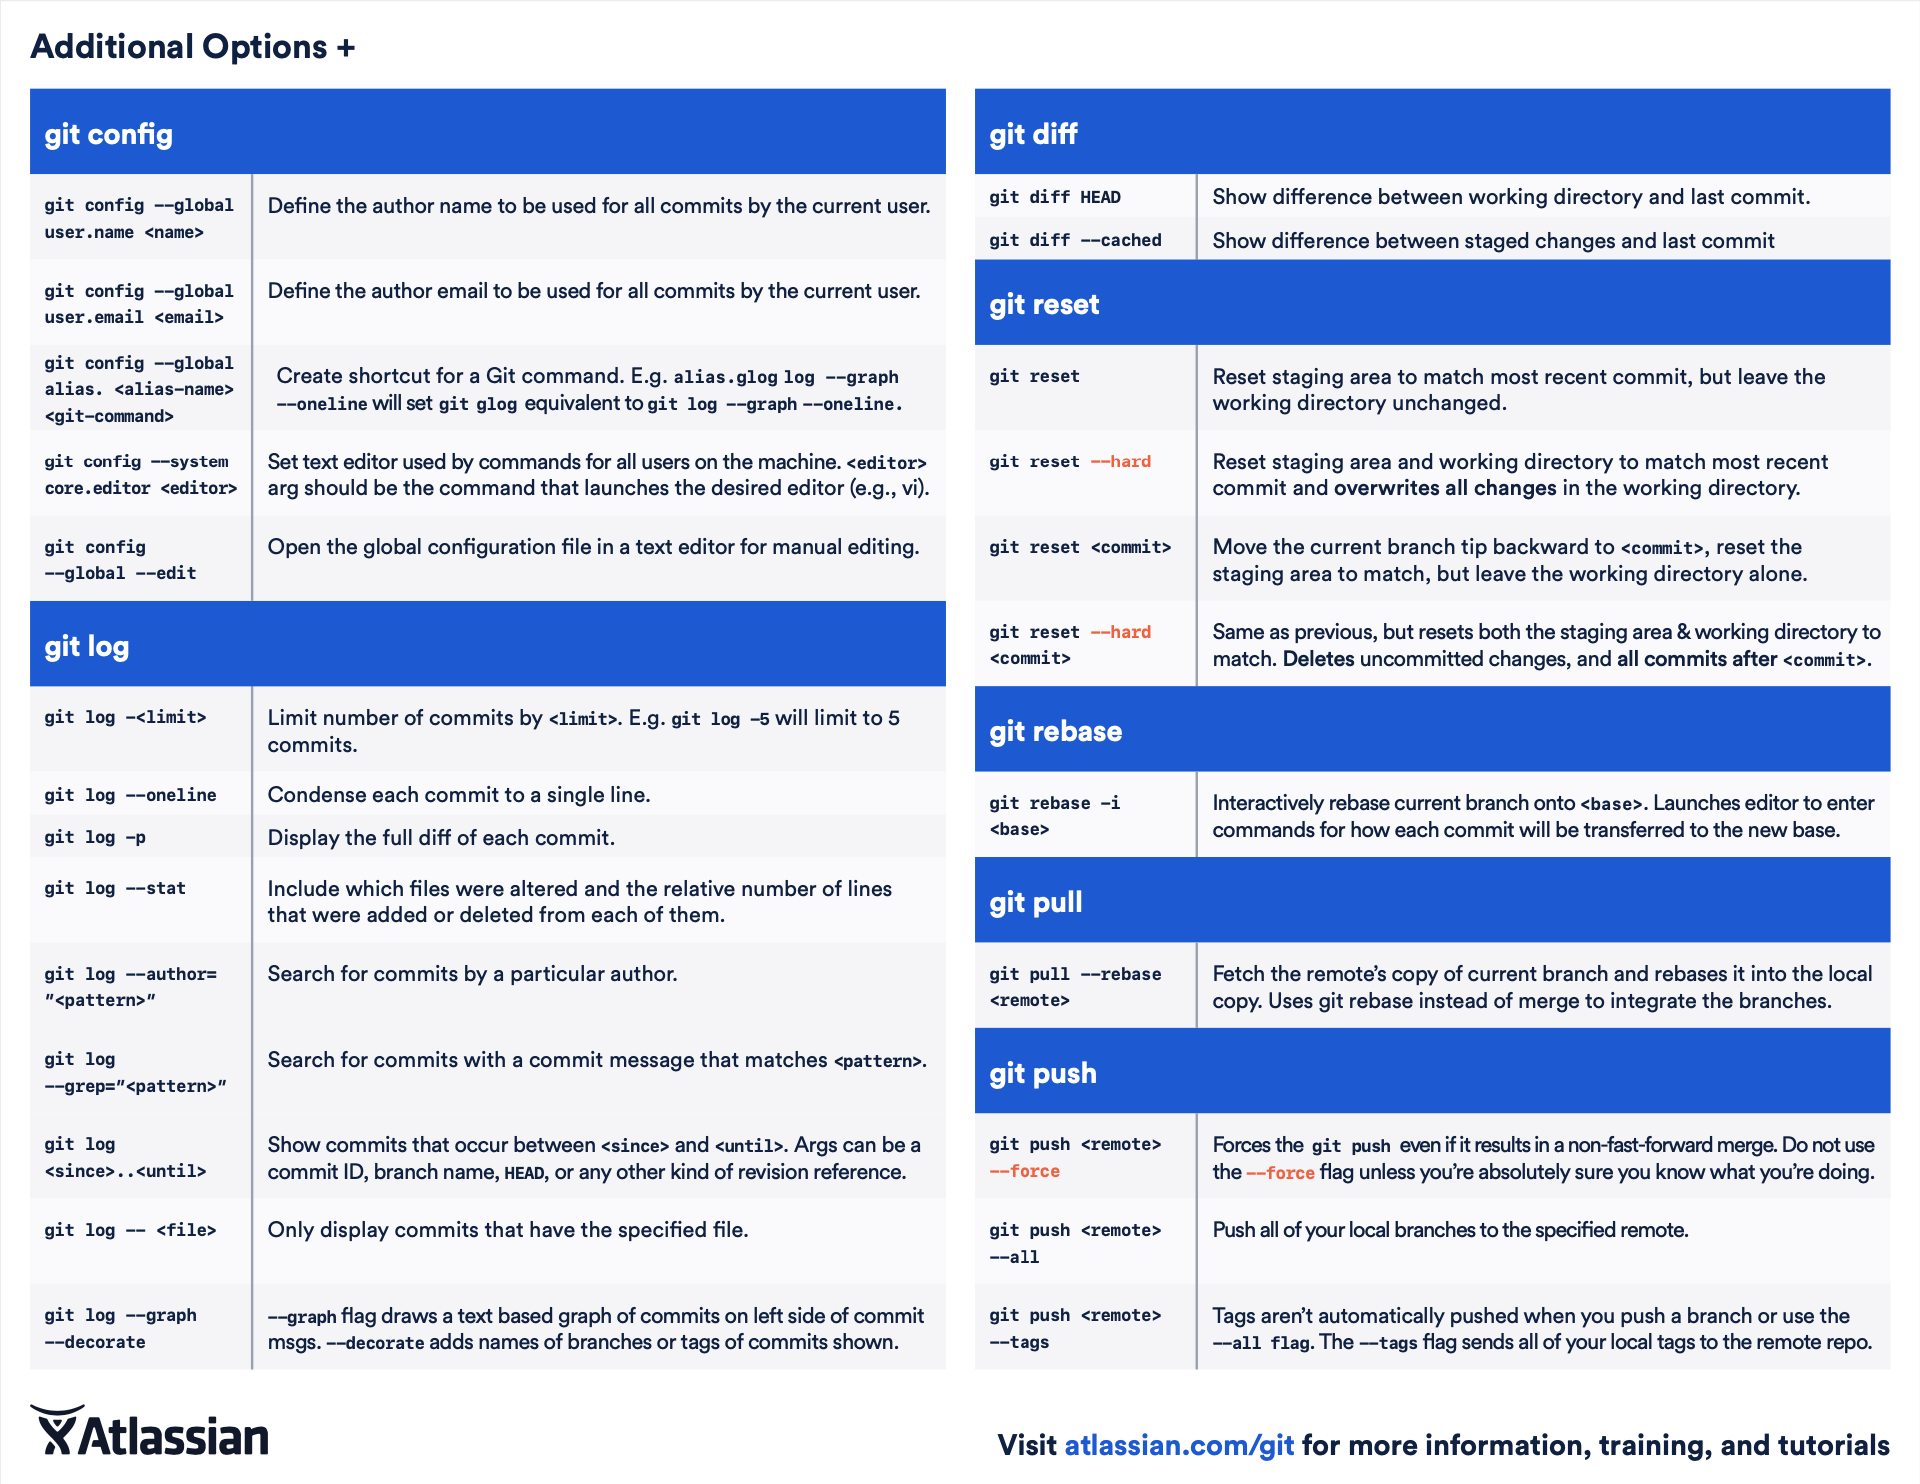
If you want to learn more about Git, here is the cheatsheet that you can work on.
So there you have it. Now you can make use of the most popular version control software and hopefully it can make your life easier.
Comments